Difference between revisions of "Validating invoices"
Jef.laethem (talk | contribs) (→Adding, editing and deleting posting data in the document view) |
|||
| (218 intermediate revisions by 4 users not shown) | |||
| Line 1: | Line 1: | ||
| − | After scanning | + | After scanning and recognition (the OCR process), the invoices have to be validated in ''"My tasklist"''. |
| − | + | The different options available in the tasklist can be viewed [[Left_sidebar|here]].<br/> | |
| + | <br/> | ||
| + | == Selecting the appropriate document type== | ||
| − | :* | + | Depending upon the settings and the company selected, there are different document types available. |
| − | :* | + | * '''All environments''': |
| + | ** Incoming invoices | ||
| + | ** Incoming mail | ||
| + | * '''EIS''': | ||
| + | ** VAT statement | ||
| + | ** PO request (see "[[PO_request_and_matching|PO request and matching]]") | ||
| + | * '''VIS''': | ||
| + | ** Coda | ||
| + | ** PO request (see "[[PO_request_and_matching|PO request and matching]]") | ||
| + | * '''EIS''', '''OIS''', '''VIS''' and '''Connected''' | ||
| + | ** Outgoing invoices | ||
| + | <br/>{{warning|For the moment, the document type ''Outgoing invoices'' is not available for MIS and NIS.}} | ||
| + | <br/>{{info|The ''Incoming invoices'' and ''Outgoing invoices'' views are similar to each other and their functionality is explained below. For more information about the ''Incoming mail'' document view, click [[incoming_mail_document_view|here]]}}<br/> | ||
| − | + | You can choose a document type by hovering over [[image:documentType.png|link=]] "Document type". The list with available document types will appear.<br/> | |
| + | <br/>[[image:document_types.png|link=]] | ||
| − | + | ==Selecting individual invoices for validation== | |
| − | + | When importing an invoice into 1Archive, a validation check is performed on the invoice. Depending upon the outcome of this check, an invoice can be marked as valid or invalid. This validation status is visible in the list view.<br/> | |
| − | * | + | To view an invoice for validation, you can select the magnifier icon at the beginning of the invoice list. |
| + | * [[image:view_ok.png|link=]] '''"View the document"''': the document is entirely valid but you are still able to change any field in this invoice. | ||
| + | * [[image:view_notok.png|link=]] '''"View the document"''': the document is invalid so further validation is needed before you are able to send this invoice to the accountancy package. | ||
| − | + | <br/> {{note|When a document appears invalid, this means it contains errors or some of the fields are in doubt. Reasons could be multiple possibilities for a field, or a required field was not recognized so you need to enter it manually, ...}}<br/> | |
| − | == | + | {{info|When a document is processed by another user, it is indicated as locked by the [[image:lock.png|link=]] "Document is locked by $USER" button. The document can still be opened (unless the "Skip locked documents" setting is turned on), but will be readonly.}}<br/> |
| + | |||
| + | When you open an invalid document, and you make it valid by fixing all errors, the magnifier icon will turn green after pressing the [[image:save.png|link=]] "Save" button. | ||
| + | <br/>{{info|It is also possible to [[Performing_support_tasks#Filter_on_validation_status|filter]] by validation status in order to send at once all valid invoices to the accountancy package.}} | ||
| − | + | <br/>[[image:List.png|link=]] | |
| − | + | ==Invoice validation view== | |
| − | + | The left hand side of the page shows the basic information about the invoice. Default, the '''header field data''' will be shown. Following tabs are available: | |
| − | + | * [[image:fieldsHeader.png|link=]] '''"Header fields"''': displaying the header information. Depending upon your environment, you have different fields available: | |
| + | ** [[Header_fields_EIS|Header fields EIS]] | ||
| + | ** [[Header_fields_OIS|Header fields OIS]] | ||
| + | ** [[Header_fields_VIS|Header fields VIS]] | ||
| + | ** [[Header_fields_Connected|Header fields Connected]] | ||
| + | ** [[Header_fields_MIS| Header fields MIS]] | ||
| + | ** [[Header_fields_NIS| Header fields NIS]] | ||
| + | * [[image:fieldsTechnical.png|link=]] '''"Technical fields"''': displaying the technical information. | ||
| + | ** [[Technical_fields|Technical fields]] | ||
| + | * [[image:fieldsDelivery.png|link=]] '''"Delivery fields"''': displaying the delivery information. | ||
| + | * [[image:fieldsNotes.png|link=]] '''"Comments"''': displaying the [[Validating_invoices#Adding_comments_to_invoices|comments]]. | ||
| + | * [[image:fieldsAttachment.png|link=]] '''"Attachments"''': displaying the [[Validating_invoices#Handling the attachments|attachments]]. | ||
| + | * [[image:fieldsRelated.png|link=]] '''"Related documents"''': displaying related documents. | ||
| + | * [[image:images.png|link=]] '''"Images"''': view the different attachments of the document in the left window of the document view. | ||
| − | + | <br/>The [[Validating_invoices#Action_buttons_available_for_validating_invoices|action buttons menu]] for the document is available above the different tab pages. The visibility of these buttons are dependant upon the workflow status in which the document is at that particular moment. | |
| − | + | At the bottom of the page, the [[Validating_invoices#Adding, editing and deleting posting data in the document view|accounting lines (posting lines)]] and the [[Validating_invoices#Adding, editing and deleting detail line data in the document view|detail lines]] are available. | |
| − | + | <br/>{{warning|An invoice always has to contain at least one account line!}}<br/> | |
| − | |||
| − | |||
| − | |||
| − | |||
| − | |||
| − | |||
| − | |||
| − | |||
| − | |||
| − | |||
| − | |||
| − | |||
| − | |||
| − | |||
| − | |||
| − | |||
| − | |||
| − | |||
| − | |||
| − | |||
| − | |||
| − | |||
| − | The | + | The right hand side part of the page default shows the scanned invoice image. Here are also a few different tab pages available: |
| + | * [[image:images.png|link=]] '''"Images"''': shows the scanned invoice image. | ||
| + | * [[image:EventLog.png|link=]] '''"Log"''': shows all log entries about what happened with the document. | ||
| + | * [[image:deliverylog.png|link=]] '''"Delivery log"''': shows all log entries for the delivery of the invoice. '''This is currently not in use.''' | ||
| + | * [[image:workflow.png|link=]] '''"Log"''': shows which workflow statuses the document had up until now. | ||
| + | * [[image:fixedflow.png|link=]] '''"Flow visualisation"''': a visual representation of the workflow log. | ||
| − | + | <br/>Click [[Document view tabs|here]] for more information on the different tabs. | |
| − | The | + | ==Adding and editing header invoice data in the document view== |
| + | The fields available in [[image:fieldsHeader.png|link=]] "Header fields" are in a fixed order. This is determined on a global level, so it can't be changed. | ||
| − | + | <br/>{{info|For fast moving between the different fields, use the '''Tab''' button on your keyboard.}}<br/> | |
| − | |||
| − | |||
| − | |||
| − | + | For more information on which fields are available, see one of the following pages: | |
| − | + | * [[Header_fields_EIS|Header fields EIS]] | |
| − | + | * [[Header_fields_OIS|Header fields OIS]] | |
| + | * [[Header_fields_VIS|Header fields VIS]] | ||
| + | * [[Header_fields_Connected|Header fields Connected]] | ||
| + | * [[Header_fields_MIS|Header fields MIS]] | ||
| + | * [[Header_fields_NIS|Header fields NIS]] | ||
| − | + | Some of the fields are prefilled by the scanbatch definitions and/or by the OCR recognition.<br/> | |
| − | |||
<br/> | <br/> | ||
| − | + | Fields prefilled by the scanbatch definition: | |
| + | <br/>'''All environments''': | ||
| + | * Invoice type | ||
| + | * Journal | ||
| + | |||
| + | '''EIS, OIS and NIS specific fields''': | ||
| + | * Period | ||
| + | |||
| + | '''VIS specific fields''': | ||
| + | * Bookyear | ||
| + | * Visible in technical fields: '''Directly to finish''': if set to true, the invoice will be set to status 'Ended' after it was validated. | ||
| + | |||
| + | '''MIS specific fields''': | ||
| + | * Period | ||
| + | * Visible in technical fields: '''Directly to finish''': if set to true, the invoice will be set to status 'Ended' after it was validated. | ||
| − | |||
| − | |||
| − | |||
| − | |||
<br/> | <br/> | ||
| − | + | Fields prefilled by the OCR server (only if recognized): | |
| − | |||
| − | |||
| − | |||
<br/> | <br/> | ||
| − | + | * Supplier / customer | |
| + | * Invoice number | ||
| + | * Invoice date | ||
| + | * Due date | ||
| + | * OGM | ||
| + | * Currency | ||
| + | * Total amount | ||
| − | + | '''EIS''', '''VIS''', '''Connected''' and '''MIS''' will recognize two extra fields: | |
| − | + | * Net amount | |
| − | + | * VAT amount | |
| − | * | ||
| − | * | ||
| − | |||
| − | + | <br/>{{info|Above fields (''Net amount'' and ''VAT amount'') will be calculated on '''OIS''' and '''NIS'''.}}<br/> | |
| − | + | {{warning|Amounts cannot be a negative number!}}<br/> | |
| − | + | Fields may have different background colours, based on their status: | |
| + | * '''White''': everything is ok, the field does not contain any errors or doubts. | ||
| + | * '''Yellow''': the recognition server found multiple possibilities. The most probable value is proposed. The other options can be viewed by clicking in the field. Choose the correct value. | ||
| + | * '''Red''': this field is required and no value could be found by the recognition server or the validation check performed on that field returned incorrect. | ||
| − | + | <br/>{{note|In case of a yellow field, you always need to press "Enter" on your keyboard to confirm the value.}} | |
| + | <br/>{{warning|Invoices containing fields with red or yellow backgrounds cannot be transferred to the accountancy package.}}<br/> | ||
| − | + | Some of the header fields are filled in based on the values in other fields. | |
| + | * '''Due date''': based on the supplier / customer payment term. | ||
| + | * '''Currency''': either recognized by the recognition server or based on the supplier. For more details, see [[Appendix:_Currency|Appendix: Currency]] | ||
| − | |||
| − | + | To enter data in a field, there are different options available: | |
| + | * Type a value. | ||
| + | * Pick a value from a [[image:listPicker.png|link=]] "List". | ||
| + | * Pick a value from the [[image:date.png|link=]] "Date" picker. See [[Validating_invoices#Selecting_dates|selecting dates]] for more. | ||
| − | + | <br/>{{note|When there's a list of values available and you start typing a value (the code or the name) for a field, the different available options (based on the text you already typed) appear. Select the right option for you.}} | |
| + | <br/>{{info|You can enter anything you want in a free textfield (like description). No value control will be performed.}} | ||
| + | <br/>{{info|If you have different lists per company (for the same field), the list for that field only shows the available options for the selected company.}} | ||
| + | <br/>{{info|You have the possibility to sort the fields in a list. Your desired sort order is saved, so when you open the same list the next time it's sorted the way you like. The sort order of the autocomplete dropdown list (the list you get when you start typing a value) is inherited of the list.}} | ||
| + | <br/>{{info|If you don't want to see all items in the lookuplist, you can use favourites: | ||
| + | * Click on [[image:favorite_inactive.png|link=]] or [[image:favorite_active.png|link=]] next to each item to add or remove the item in your list of favourites. | ||
| + | * To only show your list favourites, click on the [[image:favorite_toggle.png|link=]] "Favorites only" icon on top of all items. If you want to see all items back again, click [[image:favorite_active.png|link=]] "Favorites only".}} | ||
| + | <br/>{{info|It's also possible to enter calculations in an amount field. Entering 100+100 will result in 200 for example.}} | ||
| − | + | ===Selecting suppliers/customers=== | |
| − | |||
| − | |||
| − | |||
| − | |||
| − | + | If the correct supplier/customer doesn't appear when typing in its name or code, you can open its dialog box by clicking [[image:listPicker.png|link=]] "Select supplier/customer". This displays the list of all available suppliers/customers. | |
| − | + | [[image:search_supplier.png|link=]] | |
| − | + | <br/> | |
| − | |||
| − | |||
| − | |||
| − | |||
| − | |||
| − | |||
| − | |||
| − | + | This screen allows you to navigate in the list of available suppliers/customers. It's possible to filter the results by entering values in the available text boxes or you could sort the list by clicking on the column header fields. | |
| − | * ''' | + | There are different fields available to filter: |
| + | * '''Code''': enter the code of the supplier/customer here. | ||
| + | * '''Name''': enter the name of the supplier/customer here. | ||
| + | * '''Aliases''': if there is an alias set for the supplier/customer, enter it here to search for it. | ||
| + | <br/>{{note|An alias is used to fasten your search for a supplier/customer. See it as an alternative name for them.}}<br/> | ||
| + | * '''Choose filter field''': allows you to perform a more advanced search. Choose the field on which you would like to filter and enter a value in the text box next to the list of available fields. | ||
| − | < | + | <br/>{{note|The dialog box for searching suppliers/customers also allows you to use [[Performing_support_tasks#Using_wildcards|wildcards]].}}<br/> |
| − | + | Click the "Apply filter" button or press ''Enter'' on your keyboard to apply the filter. The list of available suppliers/customers will reduce to the ones matching your filter. | |
| − | < | + | <br/>{{note|To view the full list of suppliers/customers again, click "Clear filter". The filter gets cleared automatically when closing the screen.}} |
| − | < | + | <br/>{{Note|The number of suppliers in the list is limited to 10 at a time. To view the other search results, press: |
| − | + | * [[image:blockFirst.png|link=]] '''"First page"''': go to begin of the list. | |
| + | * [[image:blockPrevious.png|link=]] '''"Previous page"''': go to the previous page of the list. | ||
| + | * [[image:blockLast.png|link=]] '''"Last page"''': go to the end of the list. | ||
| + | * [[image:blockNext.png|link=]] '''"Next page"''': go to the next page of the list. | ||
| + | }} | ||
| − | + | <br/>{{Note|When you move the popup window, the icon [[image:Centerme.png|link=]] in the upper right corner will centralize the dialog on your screen again.}} | |
| − | |||
| − | |||
| − | + | ===Editing suppliers/customers=== | |
| − | + | Click the [[image:edit.png||link=]] "Edit" button next to the selected supplier/customer in the document view or in front of the supplier/customer in the search dialog box to be able to edit the details of the partner. | |
| − | + | The ''Edit partner'' screen will appear which allows you to edit the basic data of the partner. | |
| − | |||
| − | < | + | <br/>{{info|The fields that are available for editing, are the same fields on which you can filter the list.}} |
| − | < | + | <br/>{{warning|When editing a field inside 1Archive and sending the invoice to the accountancy package, the updated field will be sent too. So the accountancy package will contain the updated field too.}} |
| − | + | <br/>{{warning|When editing a supplier/customer in '''OIS''', make sure you use the "Synchroniseren" button in the "Dossier" menu in Octopus. Otherwise your changes made in OIS will not be available in Octopus! | |
| + | <br/>[[image:sync_dossier_octopus.png|link=]]}} | ||
| − | + | ===Adding new suppliers/customers=== | |
| + | <br/>{{warning|Not available for '''MIS''' and '''NIS'''!}}<br/> | ||
| − | = | + | If the partner you are looking for isn't available in the list, it's possible to add them via the [[image:add.png|link=]] "Add" button. Fill in the available fields and save the changes.<br/> |
| + | When clicking the "Save" button, the partner is saved in 1Archive. When booking an invoice for the newly created partner, they are sent to the accountancy package. | ||
| − | + | <br/>{{warning|'''EIS''', '''OIS''' and '''VIS''': do not enter a new value for the '''Code''' field! The correct code (the code which identifies the partner in the accountancy package) is filled in when sending the partner to the accountancy package. This code will be available after sending the partner.<br/> | |
| + | <br/>'''Connected''': a value for the '''Code''' field is required!}}<br/> | ||
| − | + | It's also possible to generate the partner data by using the '''VIES validator'''. Enter the VAT ID or the name in the ''"VAT ID"'' field and click the [[image:vies_validate.png|link=]] "Validate VAT ID with VIES" button. The fields known in the VIES system are filled in. | |
| − | + | ===Selecting dates=== | |
| − | + | If the date in a date field is not correct or empty, you can change it by typing the right value or by clicking the [[image:Date.png|link=]] "Date" picker. | |
| + | Click on the date you wish to select to fill in the field. Navigating between months and years is done as follows: | ||
| + | * [[image:previous month.png|link=|16px]] '''"Previous month"''': go to the previous month. | ||
| + | * [[image:previous year.png|link=|16px]] '''"Previous year"''': go to the previous year. | ||
| + | * [[image:next month.png|link=|16px]] '''"Next month"''': go to the next month. | ||
| + | * [[image:Next year.png|link=|16px]] '''"Next year"''': go to the next year. | ||
| − | + | <br/>{{info|Enter "w" as shortcut for the date of today.}} | |
| − | |||
| − | |||
| − | |||
| − | + | ==Adding, editing and deleting posting data in the document view== | |
| + | Below the header field data and the image of the document are the posting line fields. These are the actual lines you are booking in the accountancy package. Editing those lines is only possible in documents which are available in '''"My Tasklist"''' or '''"My documents"'''. | ||
| + | <br/> | ||
| + | <br/>Available fields: | ||
| + | * '''All environments''': | ||
| + | ** '''Account''': the account for which the line has to be booked. | ||
| + | ** '''Non ded %''': the percentage of the non deductible amount of VAT. '''This field is not available for outgoing invoices.''' | ||
| + | ** '''Description''': a description for the line. | ||
| − | + | * '''EIS''' specific fields: | |
| + | ** '''Amount''': the amount of the booking line. The default value is the net amount entered on the header. | ||
| + | <br/>{{info|It's also possible to enter VAT inclusive amounts here when using a VAT code with inclusive VAT. This is mainly used in within The Netherlands.}}<br/> | ||
| + | ** '''Cost unit''': the cost unit for which you would like to book the line. | ||
| + | ** '''Cost center''': the cost center for which you would like to book the line. | ||
| + | ** '''VAT code''': the VAT code (VAT amount will be calculated based on the code filled in here). | ||
| + | ** '''Non ded %''': the percentage of the non deductible amount of VAT. '''This field is not available for outgoing invoices.''' | ||
| + | ** '''Quantities''': define the quantities of the products for this line. | ||
| − | + | * '''OIS''' specific fields: | |
| + | ** '''Net amnt''': the net amount of the booking line. The default value is the amount entered on the header. | ||
| + | ** '''VAT code''': the VAT code used for the line. | ||
| + | ** '''Non ded %''': the percentage of the non deductible amount of VAT. '''This field is not available for outgoing invoices.''' | ||
| + | ** '''Line Vat Amount''': shows the calculated VAT amount for each line. '''This field is read-only and cannot be edited'''. | ||
| + | ** '''Cost place''': the cost place for which you would like to book the line. | ||
| + | |||
| + | * '''VIS''' specific fields: | ||
| + | ** '''Net amnt''': the net amount of the booking line. The default value is the amount entered on the header. | ||
| + | ** '''VAT type''': the type of VAT. | ||
| + | ** '''VAT %''': the percentage of VAT. '''This field is not available for outgoing invoices.''' | ||
| + | ** '''Non ded %''': the percentage of the non deductible amount of VAT. '''This field is not available for outgoing invoices.''' | ||
| + | ** '''Place''': the cost place for which you would like to book the line. | ||
| + | ** '''Unit''': the cost unit for which you would like to book the line. | ||
| + | ** '''Sort''': the cost sort for which you would like to book the line. | ||
| + | ** '''Non ded. account''': if there is a ''"Non ded %"'', on which account should this be booked? '''This field is not available for outgoing invoices.''' | ||
| + | ** '''Quantities''': define the quantities of the products for this line. | ||
| + | ** '''VAT fields''': shows the fields for the VAT declaration. | ||
| + | |||
| + | * '''Connected''' specific fields: | ||
| + | ** Both '''incoming''' and '''outgoing invoices''': | ||
| + | ** '''Net amnt''': the net amount of the booking line. The default value is the amount entered on the header. | ||
| + | ** '''DIM1''': a dimension of the ''DIM1'' lookuplist. | ||
| + | ** '''DIM2''': a dimension of the ''DIM2'' lookuplist. | ||
| + | ** '''DIM3''': a dimension of the ''DIM3'' lookuplist. | ||
| + | ** '''Incoming invoices''' specific fields | ||
| + | *** '''VAT Regime''': the kind of VAT regime that has to be used for this document. | ||
| + | *** '''VAT %''': the percentage of VAT. | ||
| + | ** '''Outgoing invoices''' specific fields | ||
| + | *** '''VATDIM1''': the kind of VAT regime that has to be used for this document. | ||
| + | *** '''VATDIM2''': the percentage of VAT. | ||
| + | *** '''VATDIM3''': an item of the ''Sales VATDIM3'' list. | ||
| + | ** '''Non ded %''': the percentage of the non deductible amount of VAT. '''This field is not available for outgoing invoices.''' | ||
| − | + | * '''MIS''' specific fields: | |
| + | ** '''Net amount''': the net amount of the booking line. The default value is the amount entered on the header. | ||
| + | ** '''Cost place''': the cost unit for which you would like to book the line. | ||
| + | ** '''VAT regime''': the kind of VAT regime that has to be used for this document. | ||
| + | ** '''VAT %''': the percentage of VAT. | ||
| + | ** '''Non ded %''': the percentage of the non deductible amount of VAT. '''This field is not available for outgoing invoices.''' | ||
| − | + | * '''NIS''' specific fields: | |
| + | ** '''Net amount''': the net amount of the booking line. The default value is the amount entered on the header. | ||
| + | ** '''VAT code''': the VAT code used for the line. | ||
| + | ** '''Department''': the department for which you would like to book the line. | ||
| + | ** '''Product line''': the product line for which you would like to book the line. | ||
| + | ** '''Product segment''': the product segment for which you would like to book the line. | ||
| + | ** '''End customer''': the end customer for which you would like to book the line. | ||
| + | ** '''Customer''': the customer for which you would like to book the line. | ||
| + | ** '''Billable''': is the invoice billable or not? | ||
| + | ** '''Related asset''': the related asset for which you would like to book the line. | ||
| + | ** '''License plate''': the license plate for which you would like to book the line. | ||
| + | ** '''Driver''': the driver which is linked to the selected license plate. '''This field is not editable.''' | ||
| + | ** '''Quantities''': define the quantities of the products for this line. | ||
| + | ** '''IFRS''': define the IFRS segment for this line | ||
| + | ** '''Cutoff start date''': define the cutoff start date for this line | ||
| + | ** '''Cutoff end date''': define the cutoff end date for this line | ||
| − | < | + | <br/>Navigating between the different fields is the easiest using the TAB key on your keyboard.<br/> |
| + | There are a few different possibilities to create an extra posting line: | ||
| + | * Double tap the TAB key at the end of the last line. | ||
| + | * Press the down arrow on your keyboard in any field of the last line. | ||
| + | * Click the [[image:add.png|link=]] "Add line" button. | ||
| − | + | <br/>{{note|The net amount field will automatically contain the remaining amount (the difference between the net amount on the header and the net amounts on the posting lines).}}<br/> | |
| − | + | A line can be deleted by clicking the [[image:remove.png|link=]] "Remove line" button. | |
| − | |||
| − | + | {{info|If a default template is assigned to a supplier, the posting line data will be applied automatically when the invoice is imported into the 1Archive system.}}<br/> | |
| − | + | {{info|The columns can be resized by selecting the border of the column title and moving it to the left or to the right.}}<br/> | |
| − | + | {{info|Amount fields can be calculated. Entering 100+100 will result in 200 for example.}}<br/> | |
| − | |||
| − | |||
| − | |||
| − | < | + | {{warning|Net amount cannot be a negative number!}}<br/> |
| − | == | + | ===Creating posting lines with Excel=== |
| + | <br/>{{warning|This functionality is not available in Internet Explorer, but again available in Microsoft Edge.}}<br/> | ||
| + | Sometimes a document needs to have multiple posting lines. To save time in distributing the posing lines, you can create them in Excel and import them in 1Archive.<br/> | ||
| + | <br/> | ||
| + | '''How do you do this?''' | ||
| + | # Create the lines you wish to create in 1Archive in Excel | ||
| + | #* The order of the columns has to be the same order of the columns available for a posting line in 1Archive | ||
| + | # Copy the lines from Excel | ||
| + | # Paste the lines in 1Archive | ||
| + | <br/>{{warning|Make sure you use the <u>'''code'''</u> of the lookup list item value (account, dimensions, ...)!}}<br/> | ||
| + | {{warning|When importing amounts bigger than 1000, use the "." as thousand separator in Excel. Otherwise, those lines will not be imported!}}<br/> | ||
| − | ''' | + | '''Example''' |
| + | <br/>[[image:Excel_lines.png|link=]]<br/> | ||
| + | <br/> | ||
| + | These lines in Excel result in following lines in 1Archive (EIS example): <br/> | ||
| + | <br/> | ||
| + | [[image:posting_lines.png|link=]] | ||
| − | + | ==Managing templates for posting lines== | |
| − | + | Templates for posting lines will facilitate the input of posting lines drastically. | |
| − | + | <br/>{{info|The templates which are defined in Venice (both global and other templates) are synchronised into 1Archive.}}<br/> | |
| − | |||
| − | |||
| − | |||
| + | ===Create templates for posting lines=== | ||
| + | Templates can be managed using the [[image:template.png|link=]] "Templates" button in the action buttons menu. A screen similar to the document view appears.<br/> | ||
| + | This screen consists of 3 main parts: | ||
| + | * the overview of the different available templates. | ||
| + | * the preview of the image of the invoice together with the different logs and the flow visualisation. | ||
| + | * the overview of the header fields and posting line fields defined per template. | ||
| − | + | <br/>To add a template, click the [[image:add.png|link=]] "Add template" button. | |
| + | <br/>{{note|A template is defined for a supplier/customer or for a global company.}} | ||
| + | <br/>{{info|A template can be defined for a global company by leaving the ''Supplier'' field empty.}}<br/> | ||
| − | + | When adding a new template, the overview screen changes to the "Save document as template" screen. This screen allows you to define the different fields for the template. | |
| + | * '''Code''': the code of the template. | ||
| + | <br/>{{note|The format of the code is as follows: 437 - INCINV - 1 with ''"437"'' as the code of the supplier/customer, ''"INCINV"'' the code for the type of invoice and ''"1"'' as the number of the template.}} | ||
| + | <br/>{{note|If the number of the template is 1, this means that it is the '''second''' template for that supplier/customer. The first is never numbered.}}<br/> | ||
| + | * '''Name''': the name of the template. Default value is the same as the code. | ||
| + | * '''Default template''': check this box when the template has to be the default template for this supplier/customer. | ||
| + | * '''Supplier/Customer''': the supplier/customer for which you are adding the template. | ||
| + | <br/>{{note|When selecting a supplier/customer in the document view (and they have a default template assigned), the default template will automatically be applied.}}<br/> | ||
| − | + | Below the above described fields, it's possible to add some header and posting line data. For the header data, it's possible to add a comment (remark in VIS).<br/> | |
| + | The most important thing of the templates are the posting line fields. | ||
| − | + | <br/>{{note|When you already filled in some data in the posting lines in the document view, this data will be taken over in the posting line data of the template view.}}<br/> | |
| − | + | Following fields are available: | |
| + | '''All environments''': | ||
| + | * '''Net amnt''': choose the net amount for the line. There's the possibility to choose between 2 options: | ||
| + | ** ''Fixed'': fill in a fixed net amount for this line. | ||
| + | ** ''Percent'': fill in a percentage for this line. The correct amount will be calculated based on the net amount on the header and the percentage filled in. | ||
| + | <br/>{{note|When leaving the value blank, you have to fill in a value in the document view.}}<br/> | ||
| + | {{note|When using the percentage option, make sure you add lines until you have a total of 100%.}}<br/> | ||
| + | * '''Account''': choose the account for which the booking has to be done. | ||
| + | * '''Description''': fill in a description for this line. | ||
| + | * '''Order''': determine the order of the lines. Default, this will start with 1 and increase when adding a line. | ||
| − | + | '''EIS''' specific fields: | |
| + | * '''Cost unit''': choose the cost unit for which you would like to book the line. | ||
| + | * '''Cost center''': choose the cost center for which you would like to book the line. | ||
| + | * '''VAT code''': choose the VAT code applicable to this line. | ||
| + | * '''Non ded %''': the non deductible percentage. '''This field is not available for outgoing invoices.''' | ||
| − | + | '''OIS''' specific fields: | |
| + | * '''VAT code''': choose the VAT code applicable to this line. | ||
| + | * '''Cost place''': choose the cost place for which you would like to book the line. | ||
| + | * '''Non ded %''': the non deductible percentage. '''This field is not available for outgoing invoices.''' | ||
| − | + | '''VIS''' specific fields: | |
| + | * '''VAT type''': choose the VAT type applicable to the line. | ||
| + | * '''Place''': choose the cost place for which you would like to book the line. | ||
| + | * '''VAT %''': choose the VAT percentage applicable to this line. | ||
| + | * '''Sort''': choose the cost sort for which you would like to book the line. | ||
| + | * '''Non ded %''': the non deductible percentage. '''This field is not available for outgoing invoices.''' | ||
| − | + | '''Connected''' specific fields: | |
| + | * Both '''incoming''' and '''outgoing invoices''': | ||
| + | ** '''DIM1''': an item from the ''DIM1'' lookuplist. | ||
| + | ** '''DIM2''': an item from the ''DIM2'' lookuplist. | ||
| + | ** '''DIM3''': an item from the ''DIM3'' lookuplist. | ||
| + | ** '''DIM4''': an item from the ''DIM4'' lookuplist. | ||
| + | ** '''DIM5''': an item from the ''DIM5'' lookuplist. | ||
| + | ** '''DIM6''': an item from the ''DIM6'' lookuplist. | ||
| + | ** '''DIM7''': an item from the ''DIM7'' lookuplist. | ||
| + | ** '''DIM8''': an item from the ''DIM8'' lookuplist. | ||
| + | ** '''DIM9''': an item from the ''DIM9'' lookuplist. | ||
| + | * '''Incoming invoices''': | ||
| + | ** '''VAT Regime''': choose the kind of VAT that should be applied. | ||
| + | ** '''VAT %''': choose the VAT percentage that should be applied. | ||
| + | * '''Outgoing invoices''': | ||
| + | ** '''VATDIM1''': choose the kind of VAT that should be applied. | ||
| + | ** '''VATDIM2''': choose the VAT percentage that should be applied. | ||
| + | ** '''VATDIM3''': an item of the ''Sales VATDIM3'' lookuplist. | ||
| + | * '''Non ded %''': the non deductible percentage. '''This field is not available for outgoing invoices.''' | ||
| − | + | '''MIS''' specific fields: | |
| + | * '''Cost place''': choose the cost place for which you would like to book the line. | ||
| + | * '''VAT regime''': choose the VAT regime applicable to the line. | ||
| + | * '''VAT %''': choose the VAT percentage applicable to this line. | ||
| + | * '''Non ded %''': the non deductible percentage. '''This field is not available for outgoing invoices.''' | ||
| − | ''' | + | '''NIS''' specific fields: |
| + | * '''Department''': choose the department for which you would like to book the line. | ||
| + | * '''Customer''': choose the customer for which you would like to book the line. | ||
| + | * '''Product segment''': choose the product segment for which you would like to book the line. | ||
| + | * '''Product line''': choose the product line for which you would like to book the line. | ||
| − | + | <br/>{{info|You can make use of [[Appendix:_Keywords|keywords]] on all text fields of a template. At the moment, those are only the comment on header level and description on posting line level.}}<br/> | |
| − | |||
| − | |||
| − | |||
| − | |||
| − | |||
| − | |||
| − | |||
| − | |||
| − | |||
| − | |||
| − | |||
| − | |||
| − | |||
| − | |||
| − | |||
| − | |||
| − | |||
| − | |||
| − | |||
| − | |||
| − | + | If a template is defined as default, it will automatically be applied when importing invoices. | |
| − | ' | + | <br/>{{note|There can only be one default template per supplier/customer. If you indicate a new template as default, the old one will become a non default.}}<br/> |
| + | {{info|When defining a template on company level, it's not possible to define it as default.}}<br/> | ||
| − | + | After finishing filling in the template data, click "Save". If you don't want to save, click "Back". | |
| − | |||
| − | |||
| − | === | + | ===Edit templates for posting lines=== |
| − | + | Templates can be edited by clicking the [[image:edit.png|link=]] "Edit template" button in the template overview screen.<br/> | |
| + | The screen that appears is the same screen for creating templates. See [[Validating_invoices#Create templates for posting lines|above]] for more information. | ||
| − | + | ===Remove templates for posting lines=== | |
| − | |||
| − | = | + | Templates can be removed by clicking the [[image:remove.png|link=]] "Remove template" button. |
| − | + | ===Select templates for posting lines=== | |
| + | If there are different templates available, select one using the [[image:magnifier.png|link=]] "View template" button. The line with the chosen template will turn blue, this to indicate the selected template.<br/> | ||
| + | Apply the template to your document using the "Apply template" button. | ||
| − | + | <br/>{{Note|If there is a correction amount, then this amount will be added on a new line.<br/> | |
| + | '''For example''': if you have a line with a fixed amount of 100 in your template and the invoice has a net amount of 300, the correction amount of 200 will be added on an extra line if there was no second line defined.}} | ||
| − | + | ===Application of templates after scanning=== | |
| + | <br/>[[image:templates.png|link=]]<br/> | ||
| + | <br/> | ||
| − | + | ===Synchronization of templates with Venice=== | |
| + | <br/>{{warning|This feature is <u>'''VIS'''</u> only!}}<br/> | ||
| − | + | In Venice, there is a functionality called ''"Boekingsvoorstellen"''. These are synchronized with 1Archive. | |
| − | ''' | + | <br/>{{info|''"Boekingsvoorstellen"'' are available in 1Archive as templates and are indicated as an ''"External template"''. They can be used as any other template in the system.}}<br/> |
| − | + | ==Adding, editing and deleting detail line data in the document view== | |
| + | <br/>{{warning|Detail lines are only available on the <u>'''VIS'''</u> environment.}} | ||
| + | <br/> | ||
| + | They are accessible via the [[image:detaillines.png|link=]] "Detail line fields" tab.<br/> | ||
| − | + | <br/>{{info|Detail lines are also known as intrastat data.}}<br/> | |
| − | + | [[image:detail_lines_overview.png|link=]]<br/> | |
| − | + | Following fields are available: | |
| + | * '''Model''': the type of the flow. Possible values are: | ||
| + | ** ''Arrival'' | ||
| + | ** ''Dispatch'' | ||
| + | * '''Country''': the country of origin. | ||
| + | * '''Transport''': the mode of transport. | ||
| + | * '''Transaction''': the nature of the transaction. | ||
| + | * '''Commodity''': the commodity (identified via the '''GN-code''', consisting of 8 numbers). | ||
| + | * '''Mass net''': the amount of the goods, expressed in net mass. | ||
| + | * '''Supplementary unit''': the unit in which the goods are expressed. For example: square meters, the number of pieces, litres, ... | ||
| + | * '''Invoice value''': the value of the goods. | ||
| + | * '''Region''': the available regions, in case of country Belgium. | ||
| + | * '''Delivery conditions''': the terms of delivery agreed between the seller and the buyer. | ||
| − | == | + | ==Action buttons available for validating invoices== |
| − | ''' | + | On top of the page, there are different action buttons available. These buttons allow you to perform some actions on the opened document. |
| + | * [[image:back.png|link=]] '''"Close"''': close the current opened document. | ||
| + | <br/>{{warning|If there are unsaved changes, these will be lost!}}<br/> | ||
| + | * [[image:save.png|link=]] '''"Save"''': save the changes you made in the document. | ||
| − | + | <br/> | |
| + | Depending upon your user rights or the settings, following action buttons could be available: | ||
| + | * [[image:send.png|link=]] '''"Auto flow"''': send a document in the automatic flow. For more information see [[Approval_manual#Auto_flow|"''Approval manual''"]]. | ||
| + | * [[image:wf_manualflow.png|link=]] '''"Manual flow"''': define the flow manually for the document. For more information see [[Approval_manual#Manual_flow|"''Approval manual''"]]. | ||
| + | * [[image:exact.png|link=]] [[image:octopus.png|link=]] [[image:venice.png|link=]] [[image:book.png|link=]] '''"Book"''': send the invoice to the accountancy package. The document will either be in status [[Invoices_in_Waiting_feedback|"Waiting feedback"]] or [[Invoices_in_"Ready_for_download"|"Ready for download"]], depending upon your environment. | ||
| + | * [[image:accountant.png|link=]] '''"Send to TAP"''': send the invoice to an external accountant. | ||
| + | <br/>{{warning|The external accountant has to have an account on 1Archive as well!}}<br/> | ||
| + | * [[image:remove.png|link=]] '''"Cancel document"''': cancel the current document. | ||
| + | * [[image:company.png|link=]] '''"Change company"''': change the company of the document. See [[Validating invoices#Changing the company of a document|below]] for more information. | ||
| + | * [[image:template.png|link=]] '''"Templates"''': manage the different templates. See [[Validating invoices#Managing templates for posting lines|above]] for more information. | ||
| + | * [[image:yes.png|link=]] '''"Validate"''': validate the invoice. '''This is only available when ''Onea Accountancy'' is activated for the company of the document. | ||
| + | * [[image:deliveryrule.png|link=]] '''"Send with email"''': send the current opened document as an e-mail attachment to a certain e-mail address. | ||
| + | * [[image:yes.png|link=]] '''"Approve"''': approve the invoice after reviewing the entered data. | ||
| + | * [[image:back.png|link=]] '''"Back"''': send the invoice back to the previous step. | ||
| + | * [[image:rejected.png|link=]] '''"Reject"''': reject the invoice after reviewing the entered data and send it back to validation or pre-control. | ||
| + | * [[image:forward.png|link=]] '''"Forward"''': forward the invoice to another approver. | ||
| + | * [[image:informative.png|link=]] '''"Informative"''': send the invoice informative to another user. | ||
| + | * [[image:sidestep.png|link=]] '''"Side-step"''': send the invoice in a side-step to another approver. For more information see [[Approval_manual#Side-step|"''Approval manual''"]]. | ||
| + | * [[image:park.png|link=]] '''"Park"''': set the invoice on hold. | ||
| + | * [[image:unpark.png|link=]] '''"Unpark"''': make the invoice available again after it has been parked. | ||
| + | * [[image:markasread.png|link=]] '''"Mark as read"''': when an invoice has been informatively sent to you, this button allows you to mark the invoice as seen. | ||
| + | * [[image:manager.png|link=]] '''"To post-control"''': send the document directly to status post-control. '''This is only available when enabled in the company settings.''' | ||
| + | * [[image:Wf_recall.png|link=]] '''"Recall"''': recall the invoice that was sent into the approval flow. | ||
| + | * [[image:back.png|link=]] '''"Send back to AP"''': when the document is available for a TAP user, this user is allowed to send the document back to where it came from. | ||
| + | * [[image:back.png|link=]] '''"Recall"''': when the document is sent to a TAP user, the AP user has the possibility to recall the document. | ||
| − | |||
| − | + | <br/>{{Note|Depending upon your settings in "[[User_management|My account]]" after clicking the above mentioned buttons you will see the archivelist or the next invoice in the list.}}<br/> | |
| − | + | ==Automatic header data checks== | |
| − | + | The 1Archive system automatically performs some checks to make sure the invoice data is correct. | |
| − | * | + | * Duplicate invoice number check. This check compares the supplier, the invoice type, the invoice number and the year of the invoice date. |
| − | + | <br/>{{note|For outgoing invoices, no check on customer is performed. An invoice will only be marked as duplicate based on the invioce type, the invoice number and the year of the invoice date.}}<br/> | |
| − | * | + | * Net amount plus VAT amount has to be equal to the total amount. |
| − | + | * The sum of the net amounts in the posting lines has to be equal to the net amount on the header. | |
| − | * | + | * The sum of the calculated VAT amounts of all posting lines has to be equal to the VAT amount on the header. |
| − | + | <br/>{{warning|The total VAT amount has a certain tolerance amount. 0.02 for EIS and Connected, 0.04 for OIS and VIS, 0.03 for MIS and 0.03 for NIS. This means that when the VAT check is performed, the amounts can differ.}}<br/> | |
| − | |||
| − | = | + | <div style="font-size: 120%;">'''Example'''</div> |
| + | '''VAT percentage''': 21%<br/> | ||
| + | '''Net amount (header)''': 100.06<br/> | ||
| + | '''VAT amount (header)''': 21.01<br/> | ||
| + | '''Total amount (header)''': 121.07<br/> | ||
| + | <br/> | ||
| + | 2 lines with each a net amount of 50.03.<br/> | ||
| + | The calculation of the VAT amount on the lines results in a total of 21.02. This is allowed because of the tolerance. | ||
| − | + | <br/>{{note|VAT period and fiscal periods have to be open and have to be in the selected fiscal year. (VIS)}}<br/> | |
| + | {{note|Invalid fields are colored with a red background.}} | ||
| − | + | ==Auto completion rules== | |
| − | * | + | In order to facilitate the input of header and posting data, 1Archive has built in different auto completion rules. These rules are able to prefill some data on your invoice. |
| − | * | + | <br/> |
| − | * | + | <br/> |
| − | * | + | Available auto completion rules: |
| − | * | + | * Default supplier/customer values: |
| + | ** '''Account''': when selecting a supplier/customer, prefill the account which is defined on the supplier on the posting lines. | ||
| + | ** '''VAT ID''': when selecting a supplier/customer, prefill the VAT ID which is defined on the supplier. | ||
| + | ** '''Currency''': when selecting a supplier/customer, prefill the default currency which is defined on the supplier . | ||
| + | ** '''Payment term''': when selecting a supplier/customer, take the default payment term which is defined on the supplier into account. | ||
| + | ** '''VAT type/code''': when selecting a supplier/customer, prefill the default VAT code which is defined on the supplier on the posting lines. | ||
| + | ** '''VAT rate''': when selecting a supplier/customer, prefill the VAT % which is defined on the supplier . | ||
| + | ** '''Include in payment''': when selecting a supplier/customer, prefill the default ''Include in payment'' value which is defined on the supplier (VIS) . | ||
| + | * Default account values: | ||
| + | ** '''VAT code''': when selecting an account, prefill the VAT code defined on that account. | ||
| + | ** '''Cost place''': when selecting an account, prefill the cost place defined on that account. | ||
| + | ** '''Cost center''': when selecting an account, prefill the cost center defined on that account. | ||
| + | ** '''Non deductible''': when selecting an account, prefill the default non deductible percentage. | ||
| + | * '''Empty non deductible''': always enter a non deductible value of 0,00. | ||
| + | * '''Empty include in payment''': when the include in payment is empty, enter true as default value (VIS). | ||
| + | * '''Remark copied from comment to description''': copy the comment value on the header to the description field on the posting lines. | ||
| + | * '''Incoming date format''': set the incoming date (if it's empty) as format ''YYYY/MM/DD HH:MM:SS'' | ||
| − | < | + | <br/> |
| + | Overview of the auto completion rules per environment: | ||
| − | + | {| class="wikitable" style="width:70%;" | |
| + | !| | ||
| + | !colspan="2"|EIS | ||
| + | !colspan="2"|OIS | ||
| + | !colspan="2"|VIS | ||
| + | !colspan="2"|Connected | ||
| + | !colspan="2"|MIS | ||
| + | !colspan="2"|NIS | ||
| + | |- | ||
| + | !|Rule | ||
| + | !|INCINV | ||
| + | !|OUTINV | ||
| + | !|INCINV | ||
| + | !|OUTINV | ||
| + | !|INCINV | ||
| + | !|OUTINV | ||
| + | !|INCINV | ||
| + | !|OUTINV | ||
| + | !|INCINV | ||
| + | !|OUTINV | ||
| + | !|INCINV | ||
| + | !|OUTINV | ||
| + | |- | ||
| + | |Default supplier/customer account || style="text-align:center;" | X || style="text-align:center;" | X || style="text-align:center;" | X || style="text-align:center;" | X || style="text-align:center;" | X || style="text-align:center;" | X || style="text-align:center;" | X || style="text-align:center;" | X || style = "text-align:center;" | X || || style = "text-align:center;" | X || | ||
| + | |- | ||
| + | |Default supplier/customer VAT ID || style="text-align:center;" | X || style="text-align:center;" | X || style="text-align:center;" | X || style="text-align:center;" | X || style="text-align:center;" | X || style="text-align:center;" | X || style="text-align:center;" | X || style="text-align:center;" | X || style = "text-align:center;" | X || || style = "text-align:center;" | X || | ||
| + | |- | ||
| + | |Default supplier/customer currency || style="text-align:center;" | X || style="text-align:center;" | X || style="text-align:center;" | X || style="text-align:center;" | X || style="text-align:center;" | X || style="text-align:center;" | X || style="text-align:center;" | X || style="text-align:center;" | X || style = "text-align:center;" | X || || style = "text-align:center;" | X || | ||
| + | |- | ||
| + | |Default supplier/customer payment term || style="text-align:center;" | X || || style="text-align:center;" | X || style="text-align:center;" | X || style="text-align:center;" | X || || style="text-align:center;" | X || || style = "text-align:center;" | X || || style = "text-align:center;" | X || | ||
| + | |- | ||
| + | |Default supplier/customer VAT type/code/VATDIM1/regime || style="text-align:center;" | X || style="text-align:center;" | X || || || style="text-align:center;" | X || style="text-align:center;" | X || style="text-align:center;" | X || style="text-align:center;" | X || style = "text-align:center;" | X || || style = "text-align:center;" | X || | ||
| + | |- | ||
| + | |Default supplier/customer DIM1 || || || || || || || style="text-align:center;" | X || || || || || | ||
| + | |- | ||
| + | |Default supplier/customer include in payment || || || || || style="text-align:center;" | X || || || || || || || | ||
| + | |- | ||
| + | |Default account VAT code || style="text-align:center;" | X || style="text-align:center;" | X || style="text-align:center;" | X || style="text-align:center;" | X || || || || style="text-align:center;" | X || || || || | ||
| + | |- | ||
| + | |Default account VAT % || || || || || || || style="text-align:center;" | X || style="text-align:center;" | X || style = "text-align:center;" | X || || || | ||
| + | |- | ||
| + | |Default account cost place || style="text-align:center;" | X || style="text-align:center;" | X || style="text-align:center;" | X || style="text-align:center;" | X || || || || || style = "text-align:center;" | X || || || | ||
| + | |- | ||
| + | |Default account cost center || style="text-align:center;" | X || style="text-align:center;" | X || || || || || || || || || || | ||
| + | |- | ||
| + | |Default account DIM1 || || || || || || || style="text-align:center;" | X || style="text-align:center;" | X || || || || | ||
| + | |- | ||
| + | |Default account DIM2 || || || || || || || style="text-align:center;" | X || style="text-align:center;" | X || || || || | ||
| + | |- | ||
| + | |Default account DIM3 || || || || || || || style="text-align:center;" | X || style="text-align:center;" | X || || || || | ||
| + | |- | ||
| + | |Default account non deductible % || style="text-align:center;" | X || || style="text-align:center;" | X || || style="text-align:center;" | X || || style="text-align:center;" | X || || style = "text-align:center;" | X || || || | ||
| + | |- | ||
| + | |Empty non deductible || style="text-align:center;" | X || || style="text-align:center;" | X || || style="text-align:center;" | X || || style="text-align:center;" | X || || || || || | ||
| + | |- | ||
| + | |Empty include in payment || || || || || style="text-align:center;" | X || || || || || || || | ||
| + | |- | ||
| + | |Remark copied from comment to description || style="text-align:center;" | X || style="text-align:center;" | X || style="text-align:center;" | X || style="text-align:center;" | X || style="text-align:center;" | X || style="text-align:center;" | X || style = "text-align:center;" | X ||style="text-align:center;" | X || style="text-align:center;" | X || || style = "text-align:center;" | X || | ||
| + | |- | ||
| + | |Incoming date format || style="text-align:center;" | X || style="text-align:center;" | X || style="text-align:center;" | X || style="text-align:center;" | X || style="text-align:center;" | X || style="text-align:center;" | X || style="text-align:center;" | X || style="text-align:center;" | X || style = "text-align:center;" | X || || style = "text-align:center;" | X || | ||
| + | |} | ||
| − | == | + | ==Adding comments to invoices== |
| − | + | Comments are added via the [[image:fieldsNotes.png|link=]] "Comments" tab. | |
| − | + | To add a comment, type your text in the textbox below and click the "Save" button. | |
| − | |||
| − | |||
| − | |||
| − | = | + | When a comment is added, the 1Archive system automatically adds the current date and time, the user who commented and an indication that comments are available. [[image:comments.png|link=]] |
| − | + | <br/>{{warning|A comment cannot be removed.}} | |
| − | + | ==Handling the attachments== | |
| − | + | <br/>{{warning|Please do not upload secured files in this section. Your invoice will not be booked!}}<br/> | |
| − | |||
| − | + | Attachments are handled via the [[image:fieldsAttachment.png|link=]] "Attachments" tab. | |
| + | <br/> | ||
| + | <br/> | ||
| + | To add an attachment, follow these steps: | ||
| + | # Click the [[image:add.png|link=]] "Add attachment" button. '''See below for more information'''. | ||
| + | # Select a file to upload from your computer by clicking the "Browse" button. | ||
| + | # The "Exportable" checkbox is checked by default. This ensures that the uploaded attachments gets included when downloading the attachments as a PDF. | ||
| + | # Click "Save" to save the attachment. In case you don't want to save it, click "Back". | ||
| − | + | <br/> | |
| − | * | + | When an attachment is available, you see different fields of information: |
| − | * | + | * '''Filename''': the name of the file (which it had on your computer). |
| − | * | + | * '''User''': the user who uploaded the attachment. |
| − | + | * '''Date''': the date when the attachment was uploaded. | |
| − | + | * '''Exportable''': indicates if the attachment is exportable or not. | |
| − | * | ||
| − | |||
| − | |||
| − | |||
| − | |||
| − | + | <br/>{{info|When adding an attachment, an indication with the number of additional attachments is shown. [[image:attachments.png|link=]]<br/> | |
| + | This means that the invoice itself isn't taken into account in the number shown.}} | ||
| − | * | + | <br/> |
| − | + | There are also some action buttons available: | |
| + | * [[image:addVersion.png|link=]] '''"Add version"''': add a new version of the attachment on this line. | ||
| + | * [[image:save.png|link=]] '''"Download attachment"''': download the attachment on this line. | ||
| + | * [[image:remove.png|link=]] '''"Remove attachment"''': remove the attachment on this line. | ||
| + | <br/>{{note|Images that are scanned via the webscanning cannot be removed.}}<br/> | ||
| + | * [[image:magnifier.png|link=]] '''"Open attachment"''': display the attachment on this line. | ||
| + | <br/>{{note|This functionality can also be achieved when selecting a line in the list of attachments.}} | ||
| − | + | ====Adding attachments to invoices via drag and drop==== | |
| − | + | When in the document view, it's possible to add attachments via drag and drop. | |
| + | # Drag one or more files from your computer to the open document view. | ||
| + | # After the "File upload" screen says the documents are uploaded, click "Ok". | ||
| + | # The uploaded document(s) are now in the list of attachments. | ||
| − | + | ====Adding versions to attachments==== | |
| + | Via the [[image:collapse_closed.png|link=]] "Show versions" button, the different versions of an attachment can be viewed. | ||
| + | <br/>{{info|When there are no versions available, the message ''"No file versions available"'' is shown.}}<br/> | ||
| − | * | + | In case of available versions, the different versions are shown when clicking the [[image:collapse_closed.png|link=]] "Show versions" button.<br/> |
| + | <br/> | ||
| + | Available action buttons: | ||
| + | * [[image:save.png|link=]] '''"Download attachment"''': download the attachment on this line. | ||
| + | * [[image:remove.png|link=]] '''"Remove attachment"''': remove the attachment on this line. | ||
| + | <br/> | ||
| + | Available data: | ||
| + | * '''Filename''': the name of the file (which it had on your computer). | ||
| + | * '''User''': the user who uploaded the attachment. | ||
| + | * '''Date''': the date and time when the attachment was uploaded. | ||
| − | == | + | ==Handling related documents== |
| − | + | Related documents are handled via the [[image:fieldsRelated.png|link=]] "Related documents" tab.<br/> | |
| + | <br/> | ||
| + | In case a document enters 1Archive via mail, all attachments of that mail are added to the related documents of the invoice.<br/> | ||
| + | If there are related documents available, this is indicated on the tab. [[image:related_documents_indication.png|link=]]<br/> | ||
| + | <br/> | ||
| + | The related documents can be viewed by clicking the [[image:magnifier.png|link=]] "View related document" button or by clicking the line. | ||
| + | <br/>{{warning|Make sure you selected the [[image:fieldsRelated.png|link=]] "Related documents" tab on the right, otherwise you will be looking at the images of the invoice.}} | ||
| − | + | ==Handling images== | |
| − | + | Images are handled via the [[image:images.png|link=]] "Images" tab. | |
| − | + | <br/> | |
| + | <br/> | ||
| + | This tab contains the same functionality as the previous discussed [[image:images.png|link=]] "Images" tab which is located on the right hand side of the document view. | ||
| + | Click [[Document_view_tabs#"Images"|here]] to review this information. | ||
| − | + | ==Using aliases== | |
| + | A customer, a supplier and a lookuplist item can have one or more alias(es) assigned.<br/> | ||
| + | This means that such values can be filled in based on the alias instead of the actual name of the item. | ||
| + | <br/>{{info|When a field has the possibility to pick an item from a list with the [[image:listPicker.png|link=]] "List" button, there's the possibility to find a value via an alias.}} | ||
| + | <br/>{{info|Aliases can be added by clicking the [[image:edit.png|link=]] "Edit" button next to the desired item in the list.}} | ||
| + | <br/>{{warning|Aliases are imported from the accountancy package to 1Archive, not the other way around!}} | ||
| − | + | ==Changing the company of a document== | |
| − | + | <br/>{{warning|This button is only available for NIS and Connected users!}} <br/> | |
| − | + | This button is used when a document needs to be changed from one company to another. When clicking it, you get a pop-up window where you can choose the right company.<br/> | |
| − | + | <br/>[[image:change_company.png|link=]]<br/> | |
| + | <br/> | ||
| + | Click "Ok" to change the company of the document. | ||
| − | < | + | <br/>{{warning|When clicking "Ok", make sure you click "Save" and save the document! Otherwise the change of the company will not be saved!}} |
| + | <br/>{{info|Please note that the document will disappear in the documents to validate for the old company when you click the "Save" button. From then on, it will be available for validation in the new company.}} | ||
Latest revision as of 17:00, 16 February 2021
After scanning and recognition (the OCR process), the invoices have to be validated in "My tasklist".
The different options available in the tasklist can be viewed here.
Contents
- 1 Selecting the appropriate document type
- 2 Selecting individual invoices for validation
- 3 Invoice validation view
- 4 Adding and editing header invoice data in the document view
- 5 Adding, editing and deleting posting data in the document view
- 6 Managing templates for posting lines
- 7 Adding, editing and deleting detail line data in the document view
- 8 Action buttons available for validating invoices
- 9 Automatic header data checks
- 10 Auto completion rules
- 11 Adding comments to invoices
- 12 Handling the attachments
- 13 Handling related documents
- 14 Handling images
- 15 Using aliases
- 16 Changing the company of a document
1 Selecting the appropriate document type
Depending upon the settings and the company selected, there are different document types available.
- All environments:
- Incoming invoices
- Incoming mail
- EIS:
- VAT statement
- PO request (see "PO request and matching")
- VIS:
- Coda
- PO request (see "PO request and matching")
- EIS, OIS, VIS and Connected
- Outgoing invoices
| For the moment, the document type Outgoing invoices is not available for MIS and NIS. |
| The Incoming invoices and Outgoing invoices views are similar to each other and their functionality is explained below. For more information about the Incoming mail document view, click here |
You can choose a document type by hovering over ![]() "Document type". The list with available document types will appear.
"Document type". The list with available document types will appear.
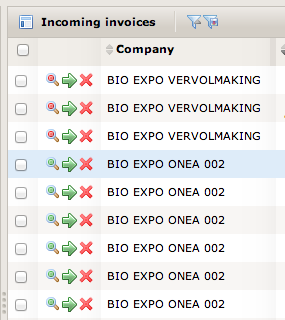
2 Selecting individual invoices for validation
When importing an invoice into 1Archive, a validation check is performed on the invoice. Depending upon the outcome of this check, an invoice can be marked as valid or invalid. This validation status is visible in the list view.
To view an invoice for validation, you can select the magnifier icon at the beginning of the invoice list.
-
 "View the document": the document is entirely valid but you are still able to change any field in this invoice.
 -
 "View the document": the document is invalid so further validation is needed before you are able to send this invoice to the accountancy package.
| When a document appears invalid, this means it contains errors or some of the fields are in doubt. Reasons could be multiple possibilities for a field, or a required field was not recognized so you need to enter it manually, ... |
| When a document is processed by another user, it is indicated as locked by the |
When you open an invalid document, and you make it valid by fixing all errors, the magnifier icon will turn green after pressing the ![]() "Save" button.
"Save" button.
| It is also possible to filter by validation status in order to send at once all valid invoices to the accountancy package. |
3 Invoice validation view
The left hand side of the page shows the basic information about the invoice. Default, the header field data will be shown. Following tabs are available:
-
 "Header fields": displaying the header information. Depending upon your environment, you have different fields available:
-
 "Technical fields": displaying the technical information.
-
 "Delivery fields": displaying the delivery information.
 -
 "Comments": displaying the comments.
 -
 "Attachments": displaying the attachments.
 -
 "Related documents": displaying related documents.
 -
 "Images": view the different attachments of the document in the left window of the document view.
The action buttons menu for the document is available above the different tab pages. The visibility of these buttons are dependant upon the workflow status in which the document is at that particular moment.
At the bottom of the page, the accounting lines (posting lines) and the detail lines are available.
| An invoice always has to contain at least one account line! |
The right hand side part of the page default shows the scanned invoice image. Here are also a few different tab pages available:
- "Images": shows the scanned invoice image.
-
 "Log": shows all log entries about what happened with the document.
 -
 "Delivery log": shows all log entries for the delivery of the invoice. This is currently not in use.
 -
 "Log": shows which workflow statuses the document had up until now.
 -
 "Flow visualisation": a visual representation of the workflow log.
Click here for more information on the different tabs.
4 Adding and editing header invoice data in the document view
The fields available in ![]() "Header fields" are in a fixed order. This is determined on a global level, so it can't be changed.
"Header fields" are in a fixed order. This is determined on a global level, so it can't be changed.
| For fast moving between the different fields, use the Tab button on your keyboard. |
For more information on which fields are available, see one of the following pages:
- Header fields EIS
- Header fields OIS
- Header fields VIS
- Header fields Connected
- Header fields MIS
- Header fields NIS
Some of the fields are prefilled by the scanbatch definitions and/or by the OCR recognition.
Fields prefilled by the scanbatch definition:
All environments:
- Invoice type
- Journal
EIS, OIS and NIS specific fields:
- Period
VIS specific fields:
- Bookyear
- Visible in technical fields: Directly to finish: if set to true, the invoice will be set to status 'Ended' after it was validated.
MIS specific fields:
- Period
- Visible in technical fields: Directly to finish: if set to true, the invoice will be set to status 'Ended' after it was validated.
Fields prefilled by the OCR server (only if recognized):
- Supplier / customer
- Invoice number
- Invoice date
- Due date
- OGM
- Currency
- Total amount
EIS, VIS, Connected and MIS will recognize two extra fields:
- Net amount
- VAT amount
| Above fields (Net amount and VAT amount) will be calculated on OIS and NIS. |
| Amounts cannot be a negative number! |
Fields may have different background colours, based on their status:
- White: everything is ok, the field does not contain any errors or doubts.
- Yellow: the recognition server found multiple possibilities. The most probable value is proposed. The other options can be viewed by clicking in the field. Choose the correct value.
- Red: this field is required and no value could be found by the recognition server or the validation check performed on that field returned incorrect.
| In case of a yellow field, you always need to press "Enter" on your keyboard to confirm the value. |
| Invoices containing fields with red or yellow backgrounds cannot be transferred to the accountancy package. |
Some of the header fields are filled in based on the values in other fields.
- Due date: based on the supplier / customer payment term.
- Currency: either recognized by the recognition server or based on the supplier. For more details, see Appendix: Currency
To enter data in a field, there are different options available:
- Type a value.
- Pick a value from a
 "List".
 - Pick a value from the
 "Date" picker. See selecting dates for more.
| When there's a list of values available and you start typing a value (the code or the name) for a field, the different available options (based on the text you already typed) appear. Select the right option for you. |
| You can enter anything you want in a free textfield (like description). No value control will be performed. |
| If you have different lists per company (for the same field), the list for that field only shows the available options for the selected company. |
| You have the possibility to sort the fields in a list. Your desired sort order is saved, so when you open the same list the next time it's sorted the way you like. The sort order of the autocomplete dropdown list (the list you get when you start typing a value) is inherited of the list. |
If you don't want to see all items in the lookuplist, you can use favourites:
|
| It's also possible to enter calculations in an amount field. Entering 100+100 will result in 200 for example. |
4.1 Selecting suppliers/customers
If the correct supplier/customer doesn't appear when typing in its name or code, you can open its dialog box by clicking ![]() "Select supplier/customer". This displays the list of all available suppliers/customers.
"Select supplier/customer". This displays the list of all available suppliers/customers.
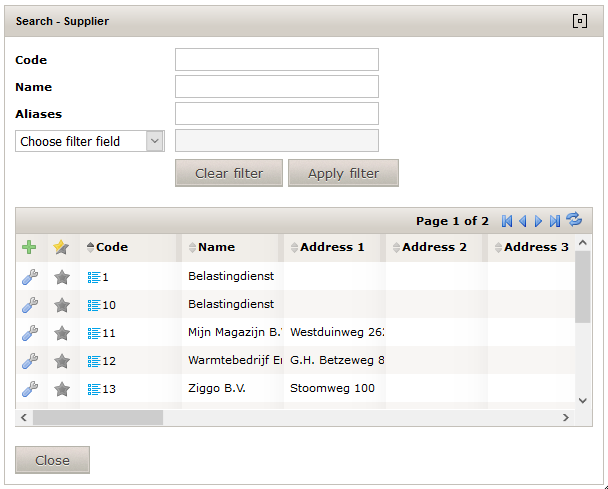
This screen allows you to navigate in the list of available suppliers/customers. It's possible to filter the results by entering values in the available text boxes or you could sort the list by clicking on the column header fields.
There are different fields available to filter:
- Code: enter the code of the supplier/customer here.
- Name: enter the name of the supplier/customer here.
- Aliases: if there is an alias set for the supplier/customer, enter it here to search for it.
| An alias is used to fasten your search for a supplier/customer. See it as an alternative name for them. |
- Choose filter field: allows you to perform a more advanced search. Choose the field on which you would like to filter and enter a value in the text box next to the list of available fields.
| The dialog box for searching suppliers/customers also allows you to use wildcards. |
Click the "Apply filter" button or press Enter on your keyboard to apply the filter. The list of available suppliers/customers will reduce to the ones matching your filter.
| To view the full list of suppliers/customers again, click "Clear filter". The filter gets cleared automatically when closing the screen. |
The number of suppliers in the list is limited to 10 at a time. To view the other search results, press:
|
| When you move the popup window, the icon |
4.2 Editing suppliers/customers
Click the ![]() "Edit" button next to the selected supplier/customer in the document view or in front of the supplier/customer in the search dialog box to be able to edit the details of the partner.
The Edit partner screen will appear which allows you to edit the basic data of the partner.
"Edit" button next to the selected supplier/customer in the document view or in front of the supplier/customer in the search dialog box to be able to edit the details of the partner.
The Edit partner screen will appear which allows you to edit the basic data of the partner.
| The fields that are available for editing, are the same fields on which you can filter the list. |
| When editing a field inside 1Archive and sending the invoice to the accountancy package, the updated field will be sent too. So the accountancy package will contain the updated field too. |
When editing a supplier/customer in OIS, make sure you use the "Synchroniseren" button in the "Dossier" menu in Octopus. Otherwise your changes made in OIS will not be available in Octopus!
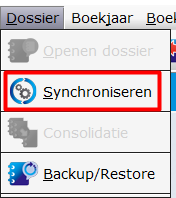 |
4.3 Adding new suppliers/customers
| Not available for MIS and NIS! |
If the partner you are looking for isn't available in the list, it's possible to add them via the ![]() "Add" button. Fill in the available fields and save the changes.
"Add" button. Fill in the available fields and save the changes.
When clicking the "Save" button, the partner is saved in 1Archive. When booking an invoice for the newly created partner, they are sent to the accountancy package.
| EIS, OIS and VIS: do not enter a new value for the Code field! The correct code (the code which identifies the partner in the accountancy package) is filled in when sending the partner to the accountancy package. This code will be available after sending the partner. Connected: a value for the Code field is required! |
It's also possible to generate the partner data by using the VIES validator. Enter the VAT ID or the name in the "VAT ID" field and click the ![]() "Validate VAT ID with VIES" button. The fields known in the VIES system are filled in.
"Validate VAT ID with VIES" button. The fields known in the VIES system are filled in.
4.4 Selecting dates
If the date in a date field is not correct or empty, you can change it by typing the right value or by clicking the ![]() "Date" picker.
Click on the date you wish to select to fill in the field. Navigating between months and years is done as follows:
"Date" picker.
Click on the date you wish to select to fill in the field. Navigating between months and years is done as follows:
-
 "Previous month": go to the previous month.
 -
 "Previous year": go to the previous year.
 -
 "Next month": go to the next month.
 -
 "Next year": go to the next year.
| Enter "w" as shortcut for the date of today. |
5 Adding, editing and deleting posting data in the document view
Below the header field data and the image of the document are the posting line fields. These are the actual lines you are booking in the accountancy package. Editing those lines is only possible in documents which are available in "My Tasklist" or "My documents".
Available fields:
- All environments:
- Account: the account for which the line has to be booked.
- Non ded %: the percentage of the non deductible amount of VAT. This field is not available for outgoing invoices.
- Description: a description for the line.
- EIS specific fields:
- Amount: the amount of the booking line. The default value is the net amount entered on the header.
| It's also possible to enter VAT inclusive amounts here when using a VAT code with inclusive VAT. This is mainly used in within The Netherlands. |
- Cost unit: the cost unit for which you would like to book the line.
- Cost center: the cost center for which you would like to book the line.
- VAT code: the VAT code (VAT amount will be calculated based on the code filled in here).
- Non ded %: the percentage of the non deductible amount of VAT. This field is not available for outgoing invoices.
- Quantities: define the quantities of the products for this line.
- OIS specific fields:
- Net amnt: the net amount of the booking line. The default value is the amount entered on the header.
- VAT code: the VAT code used for the line.
- Non ded %: the percentage of the non deductible amount of VAT. This field is not available for outgoing invoices.
- Line Vat Amount: shows the calculated VAT amount for each line. This field is read-only and cannot be edited.
- Cost place: the cost place for which you would like to book the line.
- VIS specific fields:
- Net amnt: the net amount of the booking line. The default value is the amount entered on the header.
- VAT type: the type of VAT.
- VAT %: the percentage of VAT. This field is not available for outgoing invoices.
- Non ded %: the percentage of the non deductible amount of VAT. This field is not available for outgoing invoices.
- Place: the cost place for which you would like to book the line.
- Unit: the cost unit for which you would like to book the line.
- Sort: the cost sort for which you would like to book the line.
- Non ded. account: if there is a "Non ded %", on which account should this be booked? This field is not available for outgoing invoices.
- Quantities: define the quantities of the products for this line.
- VAT fields: shows the fields for the VAT declaration.
- Connected specific fields:
- Both incoming and outgoing invoices:
- Net amnt: the net amount of the booking line. The default value is the amount entered on the header.
- DIM1: a dimension of the DIM1 lookuplist.
- DIM2: a dimension of the DIM2 lookuplist.
- DIM3: a dimension of the DIM3 lookuplist.
- Incoming invoices specific fields
- VAT Regime: the kind of VAT regime that has to be used for this document.
- VAT %: the percentage of VAT.
- Outgoing invoices specific fields
- VATDIM1: the kind of VAT regime that has to be used for this document.
- VATDIM2: the percentage of VAT.
- VATDIM3: an item of the Sales VATDIM3 list.
- Non ded %: the percentage of the non deductible amount of VAT. This field is not available for outgoing invoices.
- MIS specific fields:
- Net amount: the net amount of the booking line. The default value is the amount entered on the header.
- Cost place: the cost unit for which you would like to book the line.
- VAT regime: the kind of VAT regime that has to be used for this document.
- VAT %: the percentage of VAT.
- Non ded %: the percentage of the non deductible amount of VAT. This field is not available for outgoing invoices.
- NIS specific fields:
- Net amount: the net amount of the booking line. The default value is the amount entered on the header.
- VAT code: the VAT code used for the line.
- Department: the department for which you would like to book the line.
- Product line: the product line for which you would like to book the line.
- Product segment: the product segment for which you would like to book the line.
- End customer: the end customer for which you would like to book the line.
- Customer: the customer for which you would like to book the line.
- Billable: is the invoice billable or not?
- Related asset: the related asset for which you would like to book the line.
- License plate: the license plate for which you would like to book the line.
- Driver: the driver which is linked to the selected license plate. This field is not editable.
- Quantities: define the quantities of the products for this line.
- IFRS: define the IFRS segment for this line
- Cutoff start date: define the cutoff start date for this line
- Cutoff end date: define the cutoff end date for this line
Navigating between the different fields is the easiest using the TAB key on your keyboard.
There are a few different possibilities to create an extra posting line:
- Double tap the TAB key at the end of the last line.
- Press the down arrow on your keyboard in any field of the last line.
- Click the
 "Add line" button.
| The net amount field will automatically contain the remaining amount (the difference between the net amount on the header and the net amounts on the posting lines). |
A line can be deleted by clicking the ![]() "Remove line" button.
"Remove line" button.
| If a default template is assigned to a supplier, the posting line data will be applied automatically when the invoice is imported into the 1Archive system. |
| The columns can be resized by selecting the border of the column title and moving it to the left or to the right. |
| Amount fields can be calculated. Entering 100+100 will result in 200 for example. |
| Net amount cannot be a negative number! |
5.1 Creating posting lines with Excel
| This functionality is not available in Internet Explorer, but again available in Microsoft Edge. |
Sometimes a document needs to have multiple posting lines. To save time in distributing the posing lines, you can create them in Excel and import them in 1Archive.
How do you do this?
- Create the lines you wish to create in 1Archive in Excel
- The order of the columns has to be the same order of the columns available for a posting line in 1Archive
- Copy the lines from Excel
- Paste the lines in 1Archive
| Make sure you use the code of the lookup list item value (account, dimensions, ...)! |
| When importing amounts bigger than 1000, use the "." as thousand separator in Excel. Otherwise, those lines will not be imported! |
Example

These lines in Excel result in following lines in 1Archive (EIS example):

6 Managing templates for posting lines
Templates for posting lines will facilitate the input of posting lines drastically.
| The templates which are defined in Venice (both global and other templates) are synchronised into 1Archive. |
6.1 Create templates for posting lines
Templates can be managed using the ![]() "Templates" button in the action buttons menu. A screen similar to the document view appears.
"Templates" button in the action buttons menu. A screen similar to the document view appears.
This screen consists of 3 main parts:
- the overview of the different available templates.
- the preview of the image of the invoice together with the different logs and the flow visualisation.
- the overview of the header fields and posting line fields defined per template.
To add a template, click the ![]() "Add template" button.
"Add template" button.
| A template is defined for a supplier/customer or for a global company. |
| A template can be defined for a global company by leaving the Supplier field empty. |
When adding a new template, the overview screen changes to the "Save document as template" screen. This screen allows you to define the different fields for the template.
- Code: the code of the template.
| The format of the code is as follows: 437 - INCINV - 1 with "437" as the code of the supplier/customer, "INCINV" the code for the type of invoice and "1" as the number of the template. |
| If the number of the template is 1, this means that it is the second template for that supplier/customer. The first is never numbered. |
- Name: the name of the template. Default value is the same as the code.
- Default template: check this box when the template has to be the default template for this supplier/customer.
- Supplier/Customer: the supplier/customer for which you are adding the template.
| When selecting a supplier/customer in the document view (and they have a default template assigned), the default template will automatically be applied. |
Below the above described fields, it's possible to add some header and posting line data. For the header data, it's possible to add a comment (remark in VIS).
The most important thing of the templates are the posting line fields.
| When you already filled in some data in the posting lines in the document view, this data will be taken over in the posting line data of the template view. |
Following fields are available: All environments:
- Net amnt: choose the net amount for the line. There's the possibility to choose between 2 options:
- Fixed: fill in a fixed net amount for this line.
- Percent: fill in a percentage for this line. The correct amount will be calculated based on the net amount on the header and the percentage filled in.
| When leaving the value blank, you have to fill in a value in the document view. |
| When using the percentage option, make sure you add lines until you have a total of 100%. |
- Account: choose the account for which the booking has to be done.
- Description: fill in a description for this line.
- Order: determine the order of the lines. Default, this will start with 1 and increase when adding a line.
EIS specific fields:
- Cost unit: choose the cost unit for which you would like to book the line.
- Cost center: choose the cost center for which you would like to book the line.
- VAT code: choose the VAT code applicable to this line.
- Non ded %: the non deductible percentage. This field is not available for outgoing invoices.
OIS specific fields:
- VAT code: choose the VAT code applicable to this line.
- Cost place: choose the cost place for which you would like to book the line.
- Non ded %: the non deductible percentage. This field is not available for outgoing invoices.
VIS specific fields:
- VAT type: choose the VAT type applicable to the line.
- Place: choose the cost place for which you would like to book the line.
- VAT %: choose the VAT percentage applicable to this line.
- Sort: choose the cost sort for which you would like to book the line.
- Non ded %: the non deductible percentage. This field is not available for outgoing invoices.
Connected specific fields:
- Both incoming and outgoing invoices:
- DIM1: an item from the DIM1 lookuplist.
- DIM2: an item from the DIM2 lookuplist.
- DIM3: an item from the DIM3 lookuplist.
- DIM4: an item from the DIM4 lookuplist.
- DIM5: an item from the DIM5 lookuplist.
- DIM6: an item from the DIM6 lookuplist.
- DIM7: an item from the DIM7 lookuplist.
- DIM8: an item from the DIM8 lookuplist.
- DIM9: an item from the DIM9 lookuplist.
- Incoming invoices:
- VAT Regime: choose the kind of VAT that should be applied.
- VAT %: choose the VAT percentage that should be applied.
- Outgoing invoices:
- VATDIM1: choose the kind of VAT that should be applied.
- VATDIM2: choose the VAT percentage that should be applied.
- VATDIM3: an item of the Sales VATDIM3 lookuplist.
- Non ded %: the non deductible percentage. This field is not available for outgoing invoices.
MIS specific fields:
- Cost place: choose the cost place for which you would like to book the line.
- VAT regime: choose the VAT regime applicable to the line.
- VAT %: choose the VAT percentage applicable to this line.
- Non ded %: the non deductible percentage. This field is not available for outgoing invoices.
NIS specific fields:
- Department: choose the department for which you would like to book the line.
- Customer: choose the customer for which you would like to book the line.
- Product segment: choose the product segment for which you would like to book the line.
- Product line: choose the product line for which you would like to book the line.
| You can make use of keywords on all text fields of a template. At the moment, those are only the comment on header level and description on posting line level. |
If a template is defined as default, it will automatically be applied when importing invoices.
| There can only be one default template per supplier/customer. If you indicate a new template as default, the old one will become a non default. |
| When defining a template on company level, it's not possible to define it as default. |
After finishing filling in the template data, click "Save". If you don't want to save, click "Back".
6.2 Edit templates for posting lines
Templates can be edited by clicking the ![]() "Edit template" button in the template overview screen.
"Edit template" button in the template overview screen.
The screen that appears is the same screen for creating templates. See above for more information.
6.3 Remove templates for posting lines
Templates can be removed by clicking the ![]() "Remove template" button.
"Remove template" button.
6.4 Select templates for posting lines
If there are different templates available, select one using the ![]() "View template" button. The line with the chosen template will turn blue, this to indicate the selected template.
"View template" button. The line with the chosen template will turn blue, this to indicate the selected template.
Apply the template to your document using the "Apply template" button.
| If there is a correction amount, then this amount will be added on a new line. For example: if you have a line with a fixed amount of 100 in your template and the invoice has a net amount of 300, the correction amount of 200 will be added on an extra line if there was no second line defined. |
6.5 Application of templates after scanning
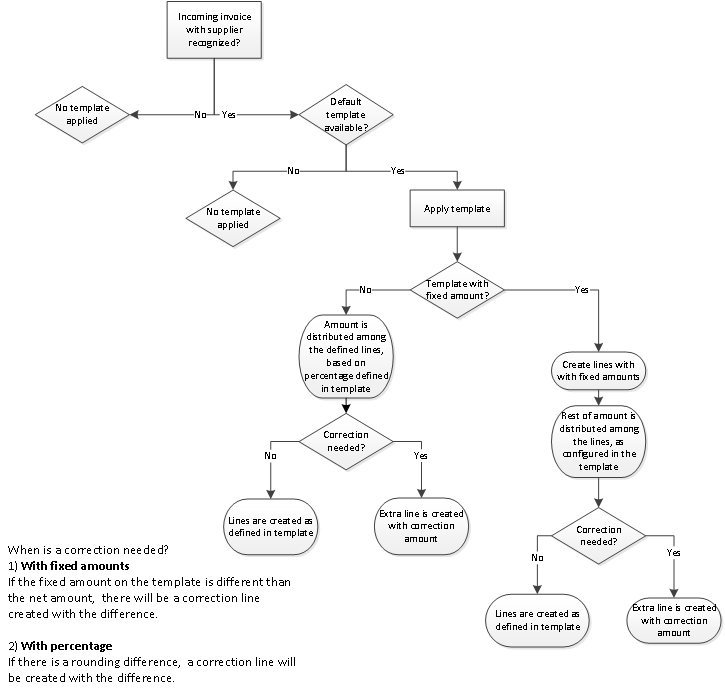
6.6 Synchronization of templates with Venice
| This feature is VIS only! |
In Venice, there is a functionality called "Boekingsvoorstellen". These are synchronized with 1Archive.
| "Boekingsvoorstellen" are available in 1Archive as templates and are indicated as an "External template". They can be used as any other template in the system. |
7 Adding, editing and deleting detail line data in the document view
| Detail lines are only available on the VIS environment. |
They are accessible via the ![]() "Detail line fields" tab.
"Detail line fields" tab.
| Detail lines are also known as intrastat data. |

Following fields are available:
- Model: the type of the flow. Possible values are:
- Arrival
- Dispatch
- Country: the country of origin.
- Transport: the mode of transport.
- Transaction: the nature of the transaction.
- Commodity: the commodity (identified via the GN-code, consisting of 8 numbers).
- Mass net: the amount of the goods, expressed in net mass.
- Supplementary unit: the unit in which the goods are expressed. For example: square meters, the number of pieces, litres, ...
- Invoice value: the value of the goods.
- Region: the available regions, in case of country Belgium.
- Delivery conditions: the terms of delivery agreed between the seller and the buyer.
8 Action buttons available for validating invoices
On top of the page, there are different action buttons available. These buttons allow you to perform some actions on the opened document.
-
 "Close": close the current opened document.
| If there are unsaved changes, these will be lost! |
-
 "Save": save the changes you made in the document.
Depending upon your user rights or the settings, following action buttons could be available:
-
 "Auto flow": send a document in the automatic flow. For more information see "Approval manual".
 -
 "Manual flow": define the flow manually for the document. For more information see "Approval manual".
 -


 "Book": send the invoice to the accountancy package. The document will either be in status "Waiting feedback" or "Ready for download", depending upon your environment.
 -
 "Send to TAP": send the invoice to an external accountant.
| The external accountant has to have an account on 1Archive as well! |
-
 "Cancel document": cancel the current document.
 -
 "Change company": change the company of the document. See below for more information.
 -
 "Templates": manage the different templates. See above for more information.
 -
 "Validate": validate the invoice. This is only available when Onea Accountancy is activated for the company of the document.
 -
 "Send with email": send the current opened document as an e-mail attachment to a certain e-mail address.
 - "Approve": approve the invoice after reviewing the entered data.
- "Back": send the invoice back to the previous step.
-
 "Reject": reject the invoice after reviewing the entered data and send it back to validation or pre-control.
 -
 "Forward": forward the invoice to another approver.
 -
 "Informative": send the invoice informative to another user.
 -
 "Side-step": send the invoice in a side-step to another approver. For more information see "Approval manual".
 -
 "Park": set the invoice on hold.
 -
 "Unpark": make the invoice available again after it has been parked.
 -
 "Mark as read": when an invoice has been informatively sent to you, this button allows you to mark the invoice as seen.
 -
 "To post-control": send the document directly to status post-control. This is only available when enabled in the company settings.
 -
 "Recall": recall the invoice that was sent into the approval flow.
 - "Send back to AP": when the document is available for a TAP user, this user is allowed to send the document back to where it came from.
- "Recall": when the document is sent to a TAP user, the AP user has the possibility to recall the document.
| Depending upon your settings in "My account" after clicking the above mentioned buttons you will see the archivelist or the next invoice in the list. |
9 Automatic header data checks
The 1Archive system automatically performs some checks to make sure the invoice data is correct.
- Duplicate invoice number check. This check compares the supplier, the invoice type, the invoice number and the year of the invoice date.
| For outgoing invoices, no check on customer is performed. An invoice will only be marked as duplicate based on the invioce type, the invoice number and the year of the invoice date. |
- Net amount plus VAT amount has to be equal to the total amount.
- The sum of the net amounts in the posting lines has to be equal to the net amount on the header.
- The sum of the calculated VAT amounts of all posting lines has to be equal to the VAT amount on the header.
| The total VAT amount has a certain tolerance amount. 0.02 for EIS and Connected, 0.04 for OIS and VIS, 0.03 for MIS and 0.03 for NIS. This means that when the VAT check is performed, the amounts can differ. |
VAT percentage: 21%
Net amount (header): 100.06
VAT amount (header): 21.01
Total amount (header): 121.07
2 lines with each a net amount of 50.03.
The calculation of the VAT amount on the lines results in a total of 21.02. This is allowed because of the tolerance.
| VAT period and fiscal periods have to be open and have to be in the selected fiscal year. (VIS) |
| Invalid fields are colored with a red background. |
10 Auto completion rules
In order to facilitate the input of header and posting data, 1Archive has built in different auto completion rules. These rules are able to prefill some data on your invoice.
Available auto completion rules:
- Default supplier/customer values:
- Account: when selecting a supplier/customer, prefill the account which is defined on the supplier on the posting lines.
- VAT ID: when selecting a supplier/customer, prefill the VAT ID which is defined on the supplier.
- Currency: when selecting a supplier/customer, prefill the default currency which is defined on the supplier .
- Payment term: when selecting a supplier/customer, take the default payment term which is defined on the supplier into account.
- VAT type/code: when selecting a supplier/customer, prefill the default VAT code which is defined on the supplier on the posting lines.
- VAT rate: when selecting a supplier/customer, prefill the VAT % which is defined on the supplier .
- Include in payment: when selecting a supplier/customer, prefill the default Include in payment value which is defined on the supplier (VIS) .
- Default account values:
- VAT code: when selecting an account, prefill the VAT code defined on that account.
- Cost place: when selecting an account, prefill the cost place defined on that account.
- Cost center: when selecting an account, prefill the cost center defined on that account.
- Non deductible: when selecting an account, prefill the default non deductible percentage.
- Empty non deductible: always enter a non deductible value of 0,00.
- Empty include in payment: when the include in payment is empty, enter true as default value (VIS).
- Remark copied from comment to description: copy the comment value on the header to the description field on the posting lines.
- Incoming date format: set the incoming date (if it's empty) as format YYYY/MM/DD HH:MM:SS
Overview of the auto completion rules per environment:
| EIS | OIS | VIS | Connected | MIS | NIS | |||||||
|---|---|---|---|---|---|---|---|---|---|---|---|---|
| Rule | INCINV | OUTINV | INCINV | OUTINV | INCINV | OUTINV | INCINV | OUTINV | INCINV | OUTINV | INCINV | OUTINV |
| Default supplier/customer account | X | X | X | X | X | X | X | X | X | X | ||
| Default supplier/customer VAT ID | X | X | X | X | X | X | X | X | X | X | ||
| Default supplier/customer currency | X | X | X | X | X | X | X | X | X | X | ||
| Default supplier/customer payment term | X | X | X | X | X | X | X | |||||
| Default supplier/customer VAT type/code/VATDIM1/regime | X | X | X | X | X | X | X | X | ||||
| Default supplier/customer DIM1 | X | |||||||||||
| Default supplier/customer include in payment | X | |||||||||||
| Default account VAT code | X | X | X | X | X | |||||||
| Default account VAT % | X | X | X | |||||||||
| Default account cost place | X | X | X | X | X | |||||||
| Default account cost center | X | X | ||||||||||
| Default account DIM1 | X | X | ||||||||||
| Default account DIM2 | X | X | ||||||||||
| Default account DIM3 | X | X | ||||||||||
| Default account non deductible % | X | X | X | X | X | |||||||
| Empty non deductible | X | X | X | X | ||||||||
| Empty include in payment | X | |||||||||||
| Remark copied from comment to description | X | X | X | X | X | X | X | X | X | X | ||
| Incoming date format | X | X | X | X | X | X | X | X | X | X | ||
11 Adding comments to invoices
Comments are added via the ![]() "Comments" tab.
"Comments" tab.
To add a comment, type your text in the textbox below and click the "Save" button.
When a comment is added, the 1Archive system automatically adds the current date and time, the user who commented and an indication that comments are available. ![]()
| A comment cannot be removed. |
12 Handling the attachments
| Please do not upload secured files in this section. Your invoice will not be booked! |
Attachments are handled via the ![]() "Attachments" tab.
"Attachments" tab.
To add an attachment, follow these steps:
- Click the "Add attachment" button. See below for more information.
- Select a file to upload from your computer by clicking the "Browse" button.
- The "Exportable" checkbox is checked by default. This ensures that the uploaded attachments gets included when downloading the attachments as a PDF.
- Click "Save" to save the attachment. In case you don't want to save it, click "Back".
When an attachment is available, you see different fields of information:
- Filename: the name of the file (which it had on your computer).
- User: the user who uploaded the attachment.
- Date: the date when the attachment was uploaded.
- Exportable: indicates if the attachment is exportable or not.
| When adding an attachment, an indication with the number of additional attachments is shown. This means that the invoice itself isn't taken into account in the number shown. |
There are also some action buttons available:
-
 "Add version": add a new version of the attachment on this line.
 - "Download attachment": download the attachment on this line.
- "Remove attachment": remove the attachment on this line.
| Images that are scanned via the webscanning cannot be removed. |
-
 "Open attachment": display the attachment on this line.
| This functionality can also be achieved when selecting a line in the list of attachments. |
12.1 Adding attachments to invoices via drag and drop
When in the document view, it's possible to add attachments via drag and drop.
- Drag one or more files from your computer to the open document view.
- After the "File upload" screen says the documents are uploaded, click "Ok".
- The uploaded document(s) are now in the list of attachments.
12.2 Adding versions to attachments
Via the ![]() "Show versions" button, the different versions of an attachment can be viewed.
"Show versions" button, the different versions of an attachment can be viewed.
| When there are no versions available, the message "No file versions available" is shown. |
In case of available versions, the different versions are shown when clicking the ![]() "Show versions" button.
"Show versions" button.
Available action buttons:
- "Download attachment": download the attachment on this line.
- "Remove attachment": remove the attachment on this line.
Available data:
- Filename: the name of the file (which it had on your computer).
- User: the user who uploaded the attachment.
- Date: the date and time when the attachment was uploaded.
Related documents are handled via the ![]() "Related documents" tab.
"Related documents" tab.
In case a document enters 1Archive via mail, all attachments of that mail are added to the related documents of the invoice.
If there are related documents available, this is indicated on the tab. ![]()
The related documents can be viewed by clicking the ![]() "View related document" button or by clicking the line.
"View related document" button or by clicking the line.
| Make sure you selected the |
14 Handling images
Images are handled via the ![]() "Images" tab.
"Images" tab.
This tab contains the same functionality as the previous discussed ![]() "Images" tab which is located on the right hand side of the document view.
Click here to review this information.
"Images" tab which is located on the right hand side of the document view.
Click here to review this information.
15 Using aliases
A customer, a supplier and a lookuplist item can have one or more alias(es) assigned.
This means that such values can be filled in based on the alias instead of the actual name of the item.
| When a field has the possibility to pick an item from a list with the |
| Aliases can be added by clicking the |
| Aliases are imported from the accountancy package to 1Archive, not the other way around! |
16 Changing the company of a document
| This button is only available for NIS and Connected users! |
This button is used when a document needs to be changed from one company to another. When clicking it, you get a pop-up window where you can choose the right company.
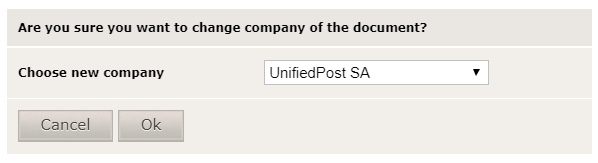
Click "Ok" to change the company of the document.
| When clicking "Ok", make sure you click "Save" and save the document! Otherwise the change of the company will not be saved! |
| Please note that the document will disappear in the documents to validate for the old company when you click the "Save" button. From then on, it will be available for validation in the new company. |