Document view tabs
1  "Images"
If the document has several attachments, you can browse through them by using the arrow buttons in the bottom right of the image screen.
-
 "First attachment": go to the first attachment of the list.
 -
 "Previous attachment": go to the previous attachment of the list.
 -
 "Last attachment": go to the last attachment of the list.
 -
 "Next attachment": go to the next attachment of the list.
Use the Adobe Acrobat specific features to navigate inside the document.
At the bottom left of the image screen you have following buttons available:
-
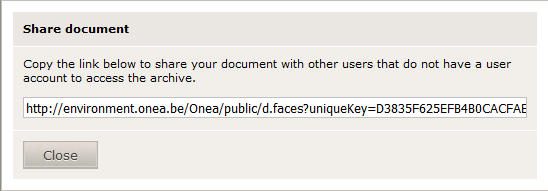
 "Share document": allows you to send the document attachment to another person.
| Note that this person does not need to be registered in 1Archive. |
This button gives you a link to the document, you have to copy paste it to send it to someone else. |
-
 "Download": allows you to download the image of the attachment.
 -
 "Detach": allows you to open the document attachment in a seperate screen. This will facilitate the input of data.
| To leave the detached document, just close the newly created screen. |
There are some extra buttons available after booking the invoice in the accountancy package:
-
 "Signature": allows you to download the signature of the image.
 -
 "Public key": allows you to download the public key of the image.
 -
 "Validate": allows you to check if the current image has been modified since it has been archived.
 - Annotating information on top of the invoice image:
- the name of the accountant.
- the period in which the invoice was booked.
- the ID of the document inside 1Archive.
- the voucher number of the document.
| For VIS the field period is the bookyear and the journal. |
| The VIS environment has an extra field Voucher date |
2  "Log"
"Log"
All events related to the invoice are stored in the logs. Following events could occur:
- Import: when a document is created.
- Processing: a log entry is created for each step during automatic processing (thumbnail creation, annotating, signing, ...).
| When an error occurs during processing, a log entry of type Error will be created. |
- User action: a log entry is created when a user performs one of the following actions:
- Set ready for download
- Cancel document
| No log entry is added when changes are made in the header fields or accounting lines. |
Following information is available:
- Step type: could be one of the following:
-
 "INFO": for regular actions like the creation of a document, routing of a document, thumbnail creation, ... .
 -
 "WARNING": for actions that require your attention like booking errors.
 -
 "ERROR": for severe errors like the failure of signing the document.
-
- Time: the date and time when the event occurred.
- Source: where the event occurred. Possible values are:
- Message: a more detailed message about what actually happened.
3  "Delivery log"
Shows all the log entries regarding the delivery of the invoice.
| In use only when delivery of documents are activated. |
4  "Log"
"Log"
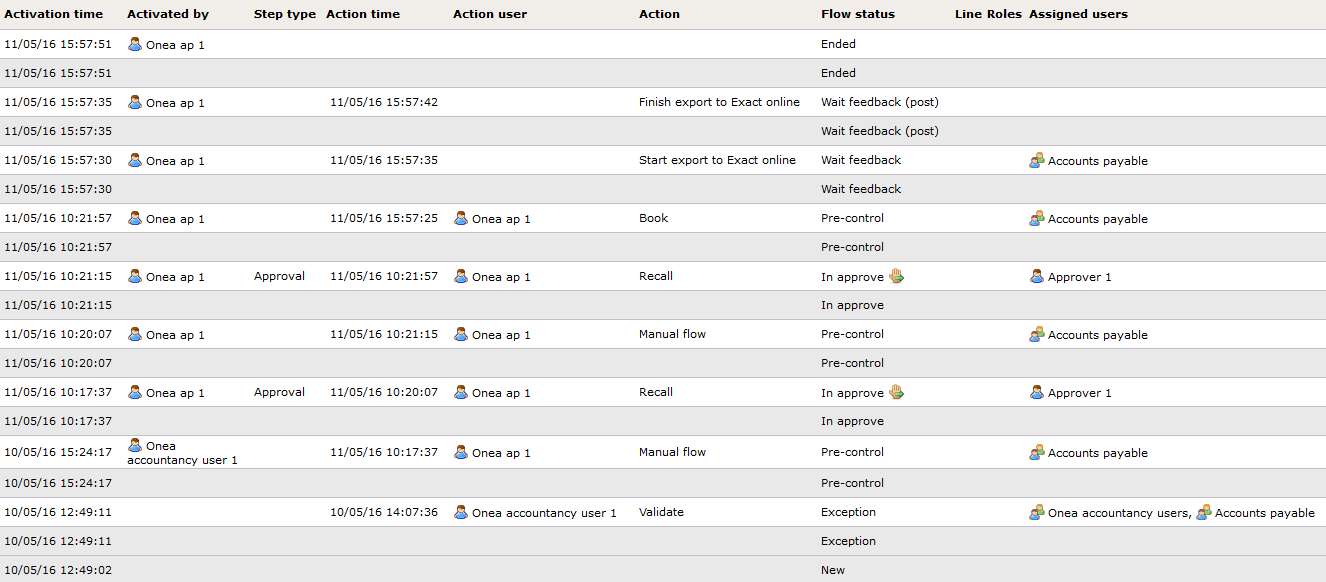
Shows an overview of all the workflow steps the document has been through. The grey lines show the workflow status the document was in, the white lines show how it got there.
Following info is available:
- Activation time: the date and time when the event was activated.
- Activated by: the user who activated the workflow event.
- Step type: the type of the step. Could be one of the following:
- Approval
- Sidestep
- Informative
- Action time: the date and time when the action ended.
- Action user: the user who initiated the action.
- Action: the action that was initiated on the document.
- Flow status: the workflow status the document was in when the event was initiated.
- Line: if the routing happened for an accounting line, the line will be indicated here.
- Roles: the role to which the document was assigned.
- Assigned users: the user(s) and/or user group(s) who were assigned to the document when the action was activated.
An example:

5  "Flow visualisation"

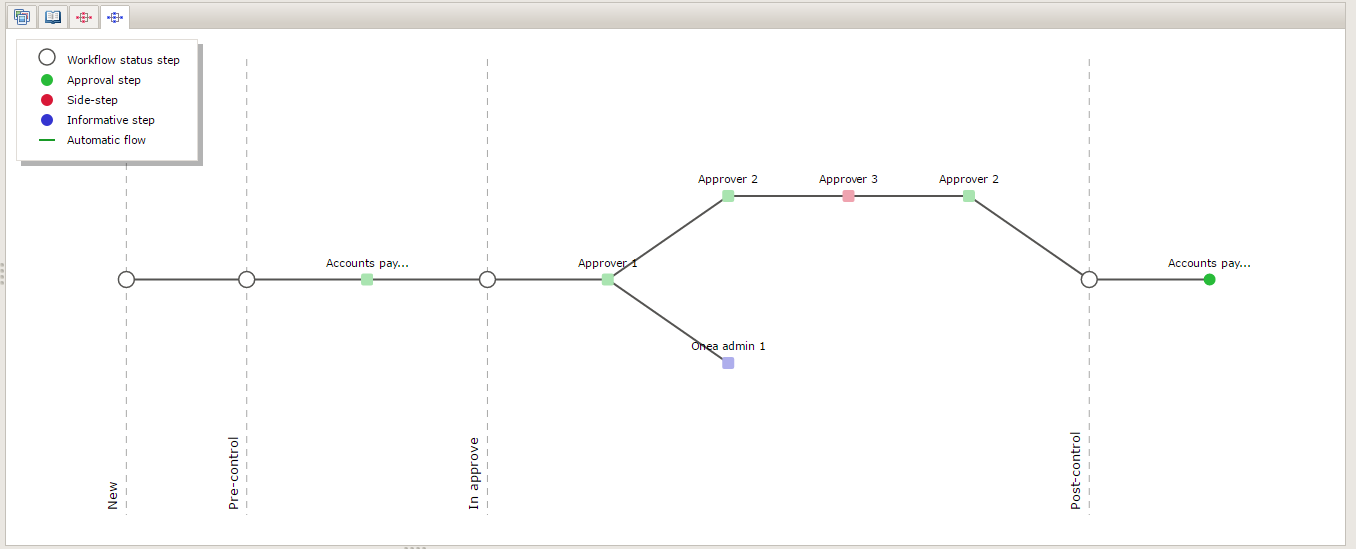
The flow visualisation shows the path a document followed in the workflow. It clearly shows which users saw the document and which actions were executed on it.
The vertical lines indicate the different workflow statuses the document has been through.
The colours of the beads represent the type of the step taken:
- Green: an approval/action step.
- Red: a side-step in the approval flow.
- Blue: an informative step in the approval flow.
A step that isn't active anymore is shown in a lighter colour and the round bead changes to a square one.
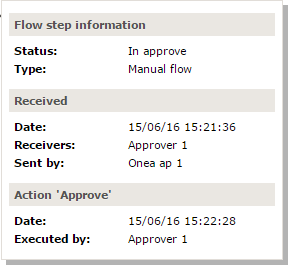
When hovering over a certain step, a pop-up screen with additional information about the current step appears. This screen contains several pieces of information like:
- the time it was received
- what action was executed.
| When the auto flow was used instead of the manual flow to send a document in the approval flow, the black connecting lines will appear in green. |
