Difference between revisions of "Appendix: Venice settings"
From 1Archive help
(→Import settings) |
|||
| (2 intermediate revisions by the same user not shown) | |||
| Line 6: | Line 6: | ||
# Choose ''Basisgegevens - Instellingen - Parameters'' | # Choose ''Basisgegevens - Instellingen - Parameters'' | ||
# Choose ''Opties'' | # Choose ''Opties'' | ||
| − | |||
#* On the tab ''Externe'', check ''Import'' | #* On the tab ''Externe'', check ''Import'' | ||
<br/> | <br/> | ||
| − | [[image:Import_settings_venice.jpg|1500x500px | + | [[image:Import_settings_venice.jpg|1500x500px|link=]] |
| − | |||
| − | |||
==View the image of the document in Venice== | ==View the image of the document in Venice== | ||
| Line 31: | Line 28: | ||
<br/> | <br/> | ||
[[image:quantities_settings.png|link=]] | [[image:quantities_settings.png|link=]] | ||
| + | |||
| + | ==Manage the access of a protected cabinet== | ||
| + | To give 1Archive access to one of your cabinets, some settings need to be changed.<br/> | ||
| + | <br/> | ||
| + | # Click the Venice button in the upper left corner of the screen | ||
| + | # Choose ''Toegangsbeheer - Parameters'' | ||
| + | # Check the checkbox for ''Externe groepen'' | ||
| + | #:[[image:externe_groepen.png|link=]] | ||
| + | # Click ''OK'' | ||
| + | # Select your dossier in Venice | ||
| + | # Choose ''Basisgegevens - Instellingen - Parameters'' | ||
| + | # Double click ''Opties'' | ||
| + | # On the tab ''Algemeen'', make sure ''Zonder wachtwoord'' is selected next to ''Beveiligd'' (right below ''Toegangsbeheer'') | ||
| + | # Also, make sure ''Specifieke rechten'' is checked | ||
| + | #:[[image:specifieke_rechten.png|link=]] | ||
| + | # Click ''OK'' | ||
| + | # Choose ''Basisgegevens - Instellingen - Rechten'' | ||
| + | # Click ''Nieuw'' to add specific rights | ||
| + | # Add an entry as follows and click the ''Save'' button | ||
| + | #:[[image:rechten.png|link=]] | ||
| + | |||
| + | ==Minimum user rights in Venice== | ||
| + | <br/>[[image:venice_user_rights_1.png|link=]]<br/> | ||
| + | <br/>[[image:venice_user_rights_2.png|link=]]<br/> | ||
| + | <br/>[[image:venice_user_rights_3.png|link=]]<br/> | ||
| + | <br/>[[image:venice_user_rights_4.png|link=]]<br/> | ||
| + | <br/>[[image:venice_user_rights_5.png|link=]]<br/> | ||
| + | <br/>[[image:venice_user_rights_6.png|link=]]<br/> | ||
Latest revision as of 15:53, 19 September 2017
Contents
1 Import settings
When booking a document in 1Archive and the import settings in Venice aren't activated, 1Archive puts the document in status Transfer (post) error and shows an error:
Error while inserting document into Venice: errImpNotActive: The Import option is not installed or not active.
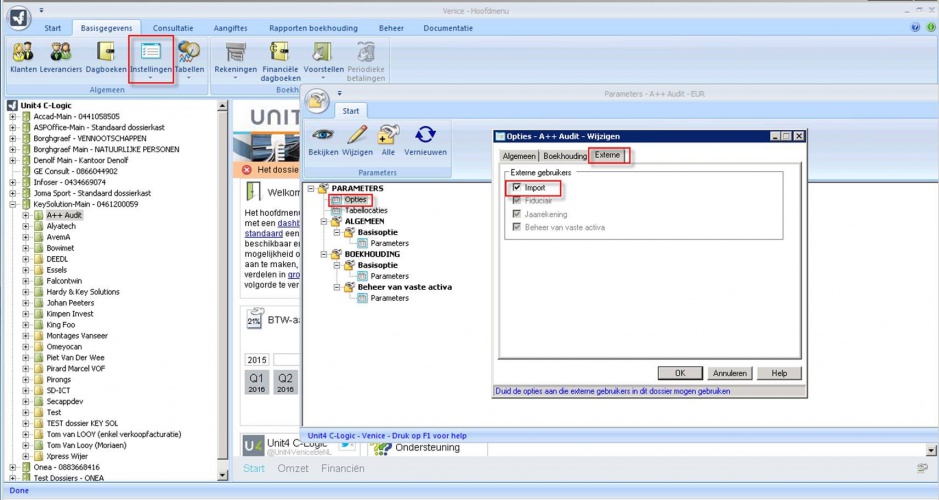
This can easily be solved by editing the settings for the company in Venice:
- Select your dossier in Venice
- Choose Basisgegevens - Instellingen - Parameters
- Choose Opties
- On the tab Externe, check Import
2 View the image of the document in Venice
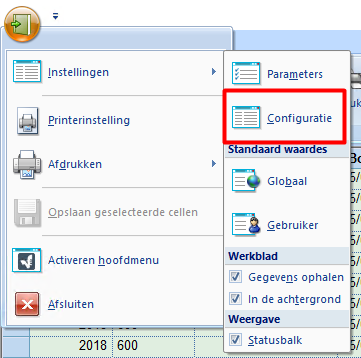
To be able to view the image of a document in Venice, follow these steps:
- Select a bookyear in Venice
- Choose Start - Aankopen/Verkopen to get the list of all documents
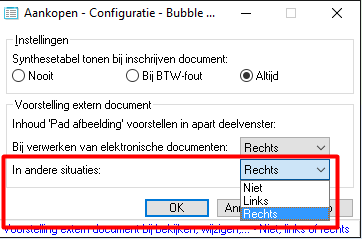
- Click the Venice start button in the left upper corner of the screen and choose Instellingen - Configuratie
- Select Rechts for In andere situaties
3 Quantities settings
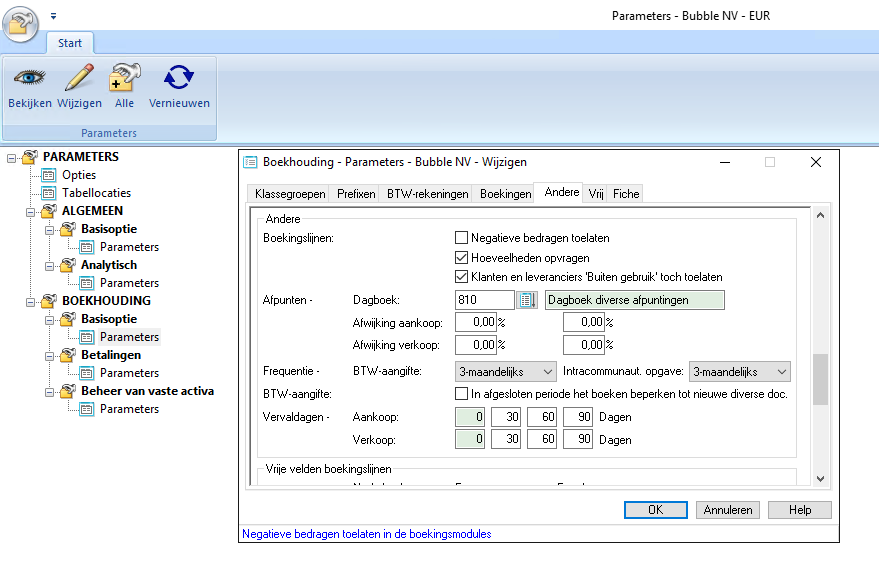
To be able to view the quantities on posting lines in Venice, you need to enable a setting. Follow these steps:
- Select your dossier in Venice
- Choose Basisgegevens - Instellingen - Parameters
- Choose BOEKHOUDING - Basisoptie - Parameters
- On the tab Andere, check Hoeveelheden opvragen
4 Manage the access of a protected cabinet
To give 1Archive access to one of your cabinets, some settings need to be changed.
- Click the Venice button in the upper left corner of the screen
- Choose Toegangsbeheer - Parameters
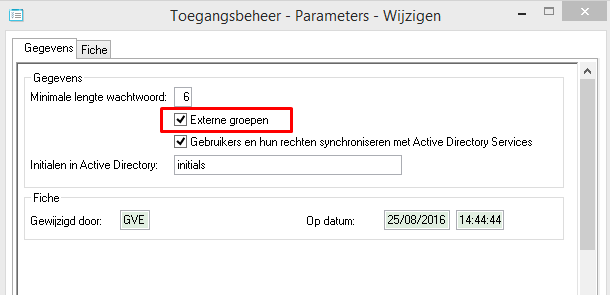
- Check the checkbox for Externe groepen
- Click OK
- Select your dossier in Venice
- Choose Basisgegevens - Instellingen - Parameters
- Double click Opties
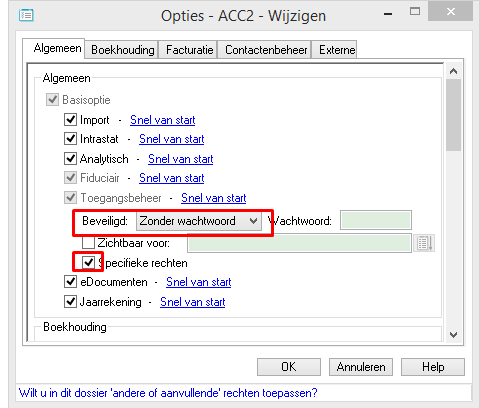
- On the tab Algemeen, make sure Zonder wachtwoord is selected next to Beveiligd (right below Toegangsbeheer)
- Also, make sure Specifieke rechten is checked
- Click OK
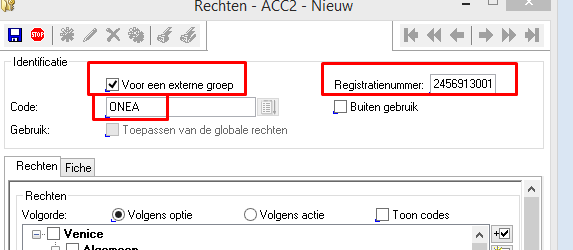
- Choose Basisgegevens - Instellingen - Rechten
- Click Nieuw to add specific rights
- Add an entry as follows and click the Save button
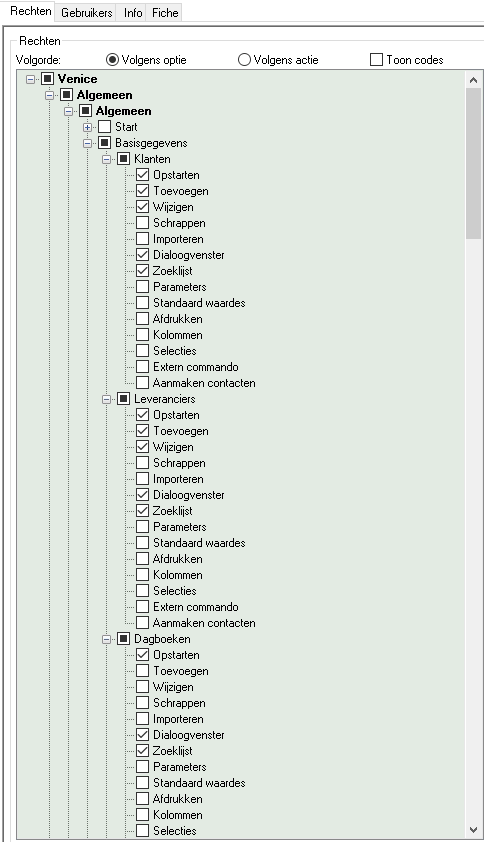
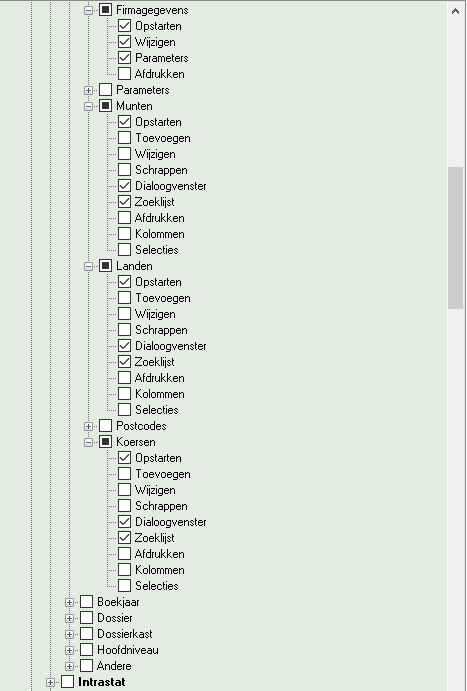
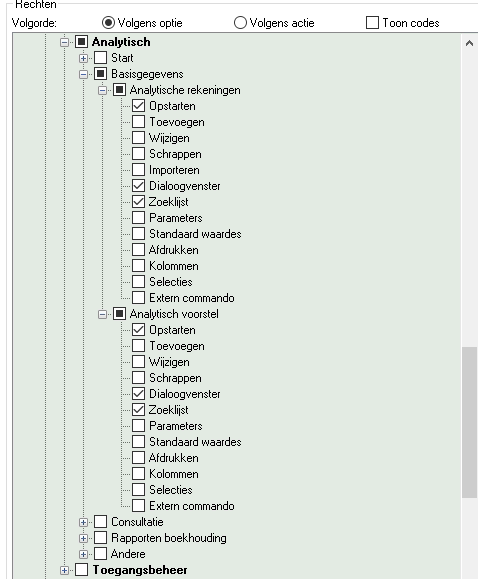
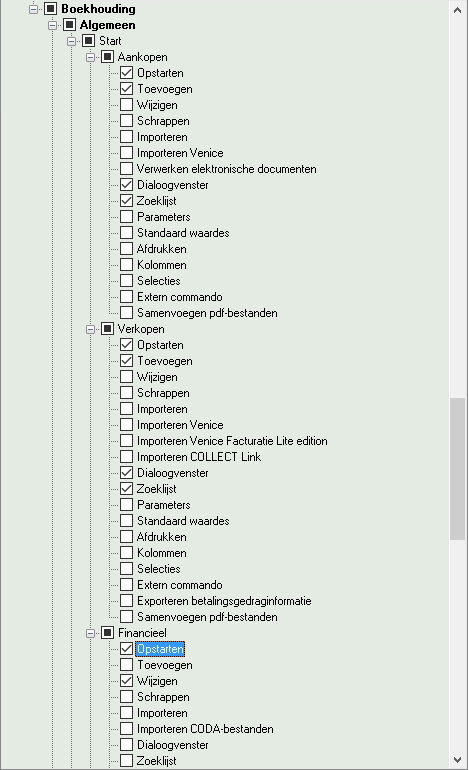
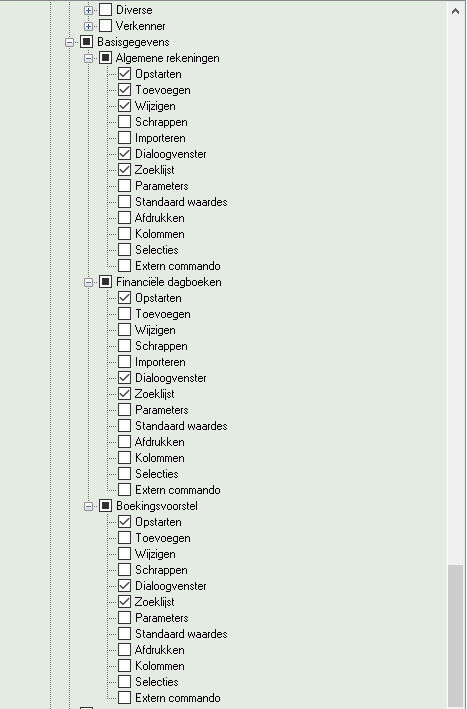
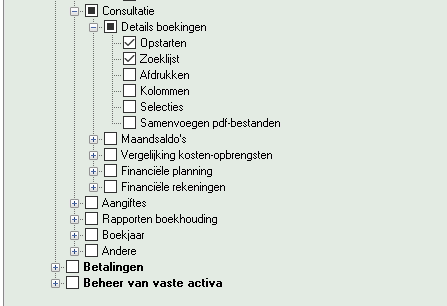
5 Minimum user rights in Venice
